|
Loading...
-
Northeast Transept
-
 |
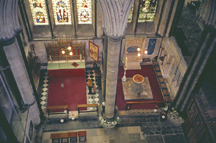
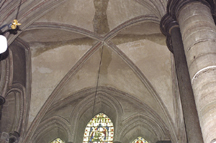
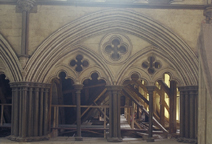
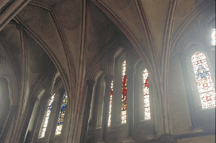
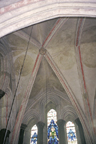
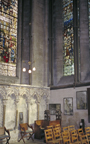
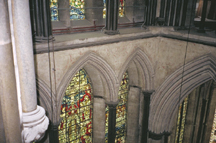
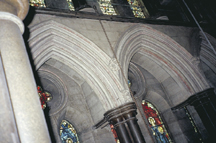
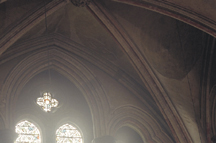
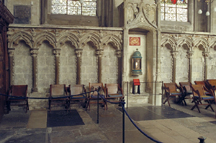
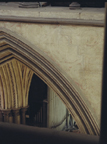
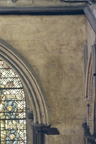
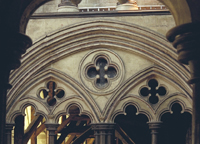
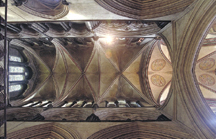
General view, northeast transept
Taken from the triforium of the south wall, southeast
transept. View looks north across the choir and into the northeast
transept. The strainer arches help to strengthen the eastern
crossing.
|
-
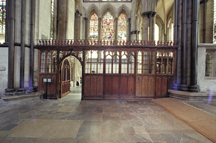 |
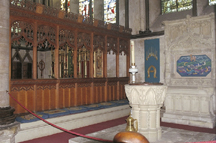
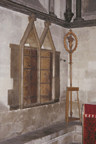
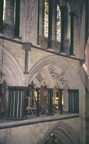
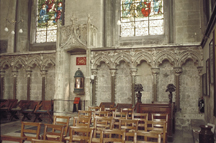
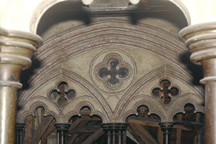
Entrance, northeast transept
Wooden screen at the entrance to the northeast
transept, called the Morning Chapel. Eastern chapels are to the
right beyond the screen.
|
-
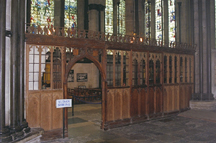 |
Entrance screen, northeast transept
|
-
-
 |
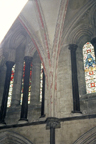
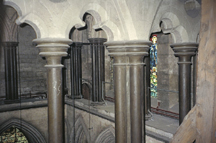
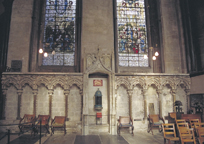
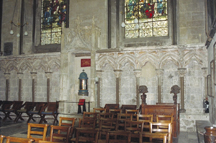
Eastern chapels, northeast transept
View taken from the triforium of the northeast
transept's west wall. At left (north) is the chapel dedicated to
St. Martin; at right (south) is the chapel dedicated to St.
Catherine, now the baptistry.
|
-
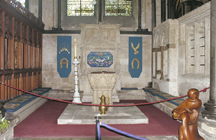 |
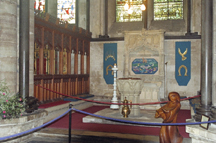
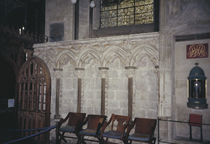
St. Catherine's Chapel
Taken from the northeast transept, facing east. The
font is 19th century.
|
-
 |
St. Catherine's Chapel
East and south walls.
|
-
 |
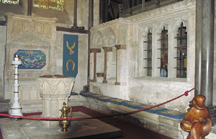
St. Catherine's Chapel
North and east walls.
|
-
 |
St. Catherine's Chapel
North wall.
|
-
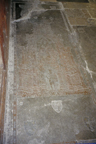 |
Brass, Bishop de Wyville
Funerary brass, c.1375. Formerly located in the
choir; moved in 1684 to St. Catherine's Chapel.
|
-
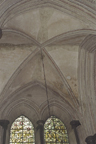 |
Vault, St. Catherine's Chapel
Taken with flash. Note the ghosts of medieval
paint.
|
-
 |
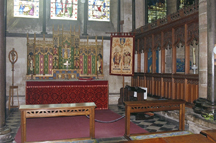
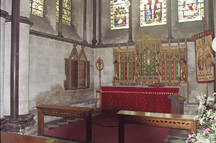
St. Martin's Chapel
South and east walls, seen from northeast transept.
The 19th-century altarpiece covers traces of a 13th-century
reredos painted on the wall.
|
-
 |
St. Martin's Chapel
East and south walls.
|
-
 |
St. Martin's Chapel
North and east walls.
|
-
 |
Aumbry, St. Martin's Chapel
Double aumbry, located on the north wall.
|
-
 |
Vault, St. Martin's Chapel
East wall and lancets visible below vault.
|
-
 |
Vault, St. Martin's Chapel
Showing the juncture of north and east walls
with vaulting.
|
-
-
 |
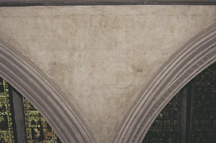
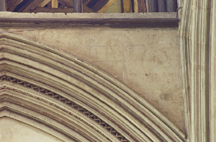
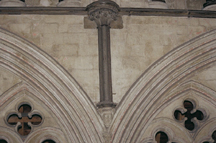
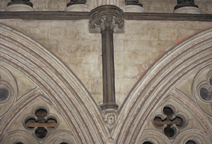
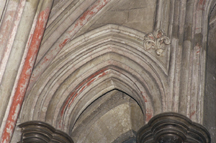
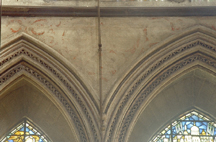
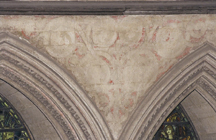
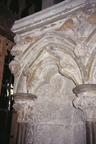
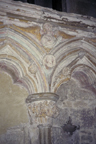
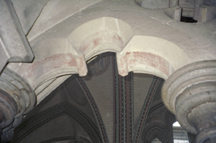
Arcade spandrels
Spandrels over the entrance to St. Martin's chapel.
Note uneven join with north wall at left.
|
-
 |
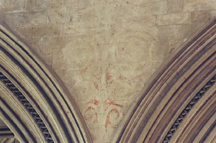
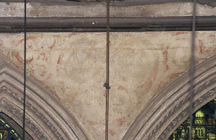
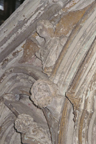
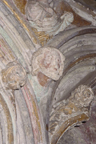
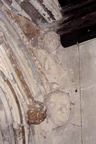
North spandrel
Medieval polychromy still visible. Taken from
triforium, north wall, with flash.
|
-
 |
North spandrel
|
-
 |
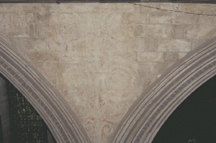
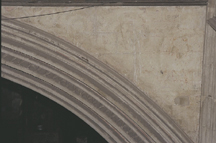
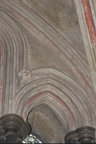
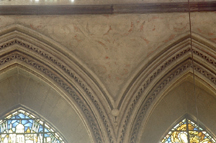
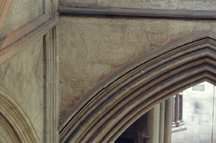
Spandrel between chapels
Taken in natural light.
|
-
 |
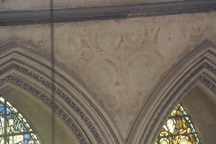
Spandrel between chapels
Taken with flash.
|
-
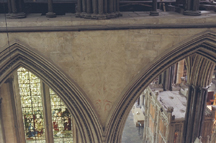 |
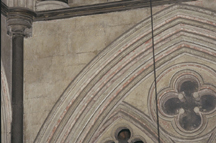
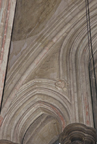
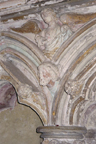
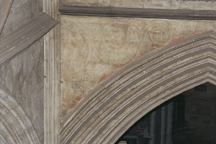
Spandrel, St. Catherine's Chapel
Spandrel between the chapel entrance and the north
aisle, bay 7. The north aisle (at right, with Audley chantry
chapel) extends towards the east.
|
-
 |
Spandrel, St. Catherine's Chapel
Taken in natural light.
|
-
 |
Spandrel, St. Catherine's Chapel
Taken with flash.
|
-
 |
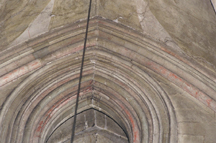
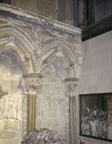
South spandrel
Note the roofing timbers visible above the north
aisle.
|
-
 |
South spandrel
Taken with flash.
|
-
-
 |
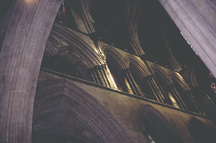
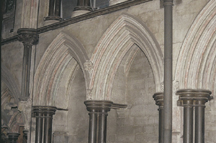
Triforium arcade, north aisle
Roofing timbers visible behind arcade.
|
-
 |
Triforium, north aisle
Provides a view to the east under the north
aisle roof.
|
-
 |
Triforium, north aisle
Taken with flash to highlight polychromy.
|
-
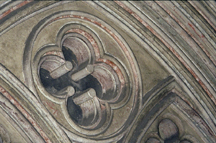 |
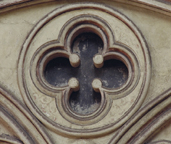
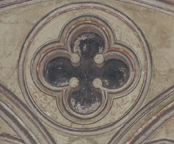
Detail, quatrefoil
Quatrefoil was painted to make it appear
perforated.
|
-
 |
Triforium, spandrel
|
-
 |
Triforium above eastern chapels
Roofing timbers visible behind arcade. View taken
from triforium of the north wall.
|
-
 |
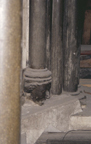
Triforium, spandrel
Purbeck shaft and corbel head, located between
the south and central arcades.
|
-
 |
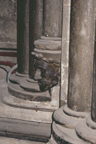
Triforium, spandrel
Purbeck shaft and corbel head, located between
the north and central arcades.
|
-
 |
Triforium, spandrel
Spandrel of the north arcade. The north wall is
at left.
|
-
 |
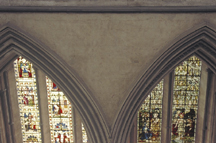
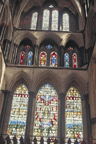
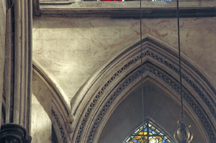
Clearstory
Clearstory over the eastern chapels (left and center)
and bay 7 of the north aisle (right).
|
-
 |
Vault ribs, center and south windows
|
-
 |
South window, detail
Molding at top of south lancet, south window.
|
-
 |
South window, detail
Juncture with vaulting and moulding at top of
south lancet, south window.
|
-
 |
South window, detail
Moulding at top of central lancet, south
window.
|
-
 |
South window, detail
Juncture with vaulting and moulding at top of
north lancet, south window.
|
-
 |
South window, detail
Polychromy, north lancet, south window.
|
-
 |
Central window, detail
Moulding at top of south lancet, central
window.
|
-
 |
Central window, detail
Moulding at top of central lancet, central
window.
|
-
 |
Central window, detail
Moulding at top of north lancet, central
window.
|
-
 |
Vault and north window
|
-
 |
North window, detail
Moulding at top of south lancet, north window.
|
-
 |
North window, detail
Moulding at top of central lancet, north
window.
|
-
 |
North wall, northeast transept
|
-
 |
Northwest corner
Medieval pulpitum, moved to the northeast transept in
1789, is at lower left.
|
-
 |
Northwest corner
Main level, triforium, and clerestory at top.
|
-
 |
Northwest corner, detail
Junction of the spandrels above the main level
windows.
|
-
 |
Northwest corner, detail
Purbeck head in corner, triforium level.
|
-
 |
Northwest corner, detail
Purbeck head in corner, seen from the west wall
triforium.
|
-
 |
Northeast corner
Junction of main level and triforium with the east
wall. Eastern chapels extend beyond the east wall, at right of
image.
|
-
 |
Northeast corner, detail
Purbeck head in corner, triforium level.
|
-
-
 |
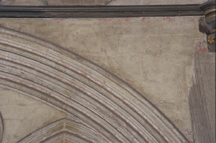
Spandrels, north wall
West corner.
|
-
 |
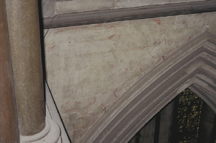
Spandrel, north wall
Note the moulding continuing to the junction
with the west wall. Seen in natural light.
|
-
 |
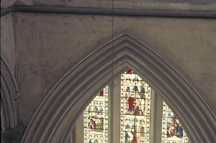
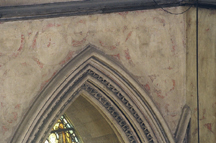
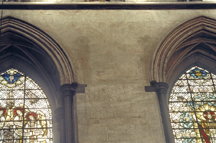
Spandrels, north wall
Spandrel between the west and central lancets. Note
remains of polychromy. Seen in natural light.
|
-
 |
Spandrel, north wall
Taken with flash.
|
-
 |
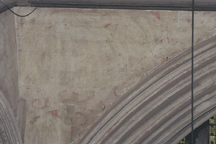
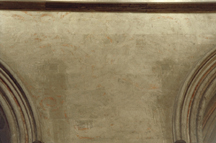
Spandrels, north wall
Located to the east of the central window. Taken in
natural light.
|
-
 |
Spandrels, north wall
|
-
 |
Spandrels, north wall
Taken with flash.
|
-
 |
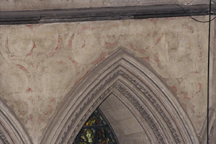
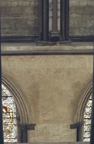
Spandrels, north wall
Spandrels over easternmost window. Taken in natural
light. Arcade marking entrance to eastern chapels is to
right of image.
|
-
 |
Spandrels, north wall
|
-
 |
Spandrels, north wall
Taken with flash.
|
-
 |
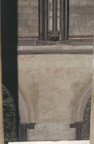
Detail, east corner
Junction of arcade spandrels at east corner.
|
-
-
 |
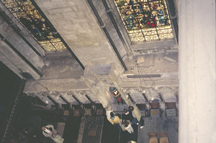
Triforium passage, north wall
Taken through the triforium arcade on the east
wall, showing depth of passageway in front of windows.
|
-
 |
Triforium arcade, north wall
Arches over lancets at triforium level.
|
-
-
 |
Clearstory, northeast corner
Junction of north wall and east wall (over eastern
chapels) at clearstory level. Note the small passageway
through the masonry at the corner.
|
-
 |
Northeast corner, detail
Taken with flash.
|
-
 |
Northeast corner, detail
Taken with flash, and showing polychromy on
vault ribs.
|
-
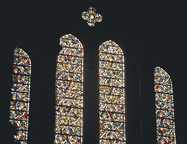 |
Clearstory, windows
None of the glass is medieval.
|
-
 |
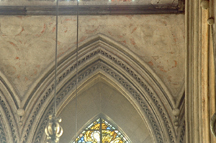
Clearstory, north wall
Showing arches above the windows and the juncture
with the northernmost vault.
|
-
 |
Clearstory, north wall
Detail of juncture with vault, shown in natural
light.
|
-
 |
Clearstory, north wall
Detail of juncture with vault, taken with flash
to enhance polychromy.
|
-
-
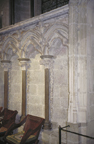
 |
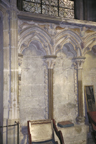
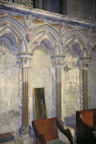
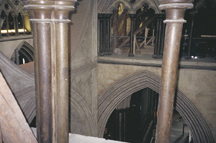
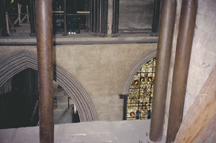
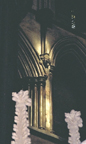
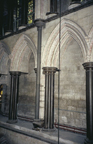
Lower level, west wall
The lower level of the west wall, northeast transept,
looking down onto the 13th century choir screen from the east
wall triforium. The choir screen was moved from its original
location at the main crossing (bay 12) to the northeast transept
in the late 18th century.
|
-
 |
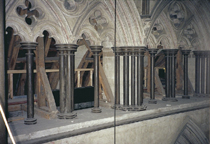
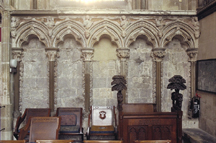
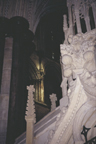
Medieval choir screen
13th century choir screen, or pulpitum, moved from the
main crossing to the northeast transept in 1789. Central niche
is from the Beauchamp chantry chapel, destroyed at the same
time.
|
-
 |
General view, former choir screen
|
-
 |
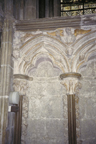
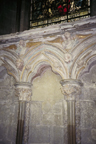
South section, choir screen
|
-
 |
South section, choir screen
Taken with flash, to enhance the surviving
medieval polychromy.
|
-
 |
South section, left portion
|
-
 |
Left niche
Corbel heads 1 and 2.
|
-
 |
Detail, left niche
Head and angel 1.
|
-
 |
Detail, left niche
Corbel head and angel 2.
|
-
 |
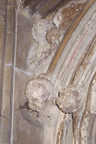
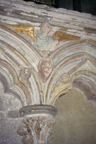
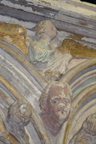
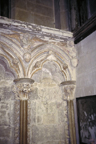
Middle niche
Corbel heads 3 and 4.
|
-
 |
Detail, middle niche
Corbel head 3.
|
-
 |
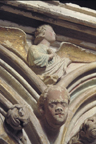
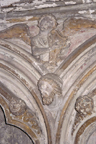
Detail, middle niche
Angel 3.
|
-
 |
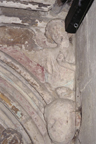
Detail, middle niche
Corbel head and angel 4.
|
-
 |
South section, right portion
|
-
 |
Right niche
Corbel heads 5 and 6.
|
-
 |
Detail, right niche
Corbel head and angel 6.
|
-
 |
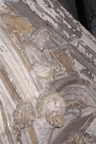
North section, choir screen
|
-
 |
North section, choir screen
Taken with flash to enhance medieval
polychromy.
|
-
 |
North section, choir screen
|
-
 |
North section, left portion
|
-
 |
Left niche
Corbel heads 7 and 8.
|
-
 |
Detail, left niche
Corbel head and angel 7.
|
-
 |
North section, central portion
|
-
 |
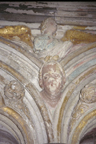
Middle niche
Corbel heads 9 and 10.
|
-
 |
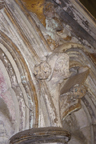
Detail, middle niche
Corbel head and angel 9, taken with
flash.
|
-
 |
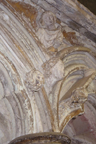
Detail, middle niche
Corbel head and angel 9, seen in
natural light.
|
-
 |
Detail, middle niche
Corbel head and angel 9, with flash.
|
-
 |
Detail, middle niche
Corbel head and angel 9, with flash.
|
-
 |
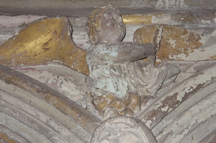
Detail, middle niche
Corbel head 9.
|
-
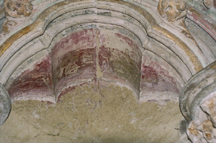 |
Detail, middle niche
Interior of niche below corbel heads 9
and 10.
|
-
 |
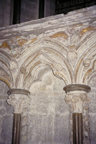
Detail, middle niche
Capitals below corbel heads 9 and 10.
|
-
 |
Detail, middle niche
Corbel head and angel 10.
|
-
 |
Detail, middle niche
Corbel head 10.
|
-
 |
Detail, middle niche
Corbel head and angel 10.
|
-
 |
North section, north portion
|
-
 |
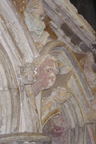
Right niche
|
-
 |
Detail, right niche
Corbel head and angel 11.
|
-
 |
Detail, right niche
Corbel head and angel 11.
|
-
 |
Detail, right niche
Corbel head and angel 12.
|
-
 |
Detail, right niche
Corbel head and angel 12.
|
-
-
 |
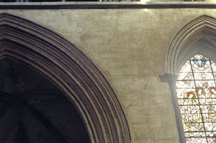
Spandrels, north aisle
Spandrels over the north aisle, bay 9, and joining
with strainer arches (at left) over the eastern crossing.
View taken from the east wall triforium.
|
-
 |
South spandrel
Detail of spandrel with polychromy, seen in
natural light.
|
-
 |
South spandrel
Spandrel with polychromy, taken with flash.
|
-
 |
North spandrel
North spandrel over the north aisle, seen from
triforium of east wall.
|
-
 |
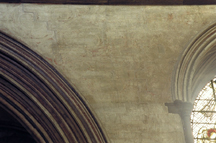
Spandrels, north aisle and window
Spandrel between north aisle, bay 9, and the west
wall window, as seen from east wall triforium.
|
-
 |
Spandrels, north aisle and window
Spandrels between north aisle and window, seen
in natural light.
|
-
 |
Spandrels, north aisle and window
|
-
 |
Spandrels between windows
|
-
 |
Spandrels between windows
Taken from east wall, triforium, in natural
light.
|
-
 |
Spandrels between windows
View taken with flash.
|
-
 |
Spandrels, detail
|
-
 |
Spandrel, northwest corner
|
-
 |
Spandrel, detail
|
-
 |
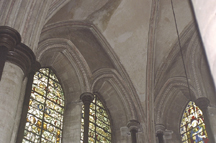
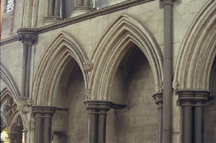
Triforium, west wall
Seen from inside the choir. Note the shift in arch
forms at the triforium level. Triforium arcade at left is over
the north choir aisle and has a sloping roof behind; arches at
right have a flat wall behind.
|
-
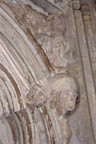
 |
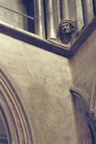
Triforium, west wall
Taken from within the choir. The head of a bishop
located at the shift in arch types looks down to the high
altar in the presbytery.
|
-
 |
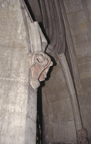
Bishop's head, detail
|
-
 |
Bishop's head, detail
|
-
 |
Triforium arcade, north aisle
Arcade located over the north aisle, bay 9, as seen
from the east wall triforium.
|
-
 |
Triforium arcade, north aisle
View taken with flash to enhance polychromy.
|
-
 |
Triforium arcade, detail
Background of central quatrefoil is blackened
to suggest perforation. Shown in natural light.
|
-
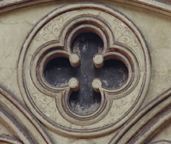 |
Triforium arcade, detail
Quatrefoil with center blackened to suggest
depth. This view is the same as above, but doctored in
Photoshop so that the painted decoration is continous
around the lobes of the quatrefoil.
|
-
 |
Triforium arcade, detail
Quatrefoil taken with flash.
|
-
 |
Triforium, north bays
The triforium narrows to a passage against the west
wall in these two bays.
|
-
 |
Triforium, middle bay
Shown in natural light.
|
-
 |
Triforium, middle bay
View taken with flash.
|
-
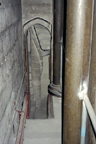 |
Triforium passage
Narrow passage along the west wall, with winding
stairs in the corner for access to different levels.
|
-
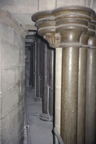 |
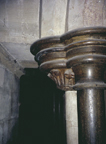
Triforium passage
View along the triforium passage. Note the
foliate capital in purbeck marble facing the wall--
perhaps originally intended for another position?
|
-
 |
Triforium passage, detail
|
-
 |
Clearstory
Northernmost and central bays at clearstory level of
the west wall. The vault ribs spring from the base of the
clearstory.
|
-
 |
Clearstory, detail
Showing polychromy on the vault ribs between the
windows.
|
-
-
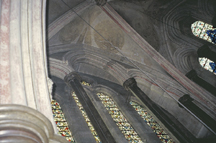
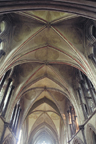 |
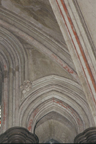
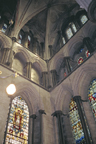
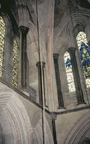
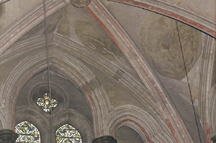
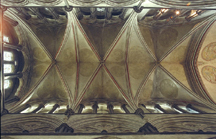
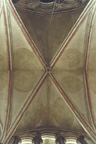
Vaults, northeast transept
View taken from north wall, looking to the south into
the southeast transept.
|
-
 |
Vaults, northeast transept
Same view as above, taken with flash to enhance
medieval polychromy.
|
-
 |
Vaults, north and center
Taken from north wall, with flash.
|
-
 |
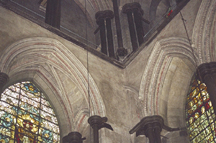
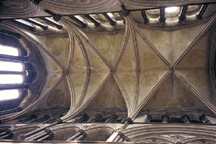
Vaults, northeast transept
From left to right are the north wall of the northeast
transept; two vaults over the two bays of the northeast transept
proper; the vault over the north aisle at the entrance to the
northeast transept; crossing vault and strainer arches in bay 8.
|
-
 |
Northeast transept vaults
|
-
 |
Northeast transept vaults
|
-
 |
Vault, north aisle, bay 8
Vault at entrance to the north transept in the
north aisle; crossing at bay 8 is adjacent to right.
|
-
 |
Vault, north aisle, bay 8
Crossing is at right
|
-
 |
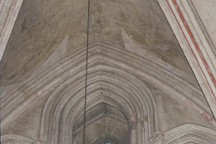
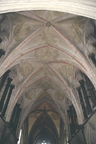
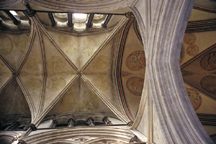
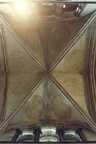
Central vault, northeast transept
East wall is at bottom of image.
|
-
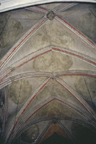
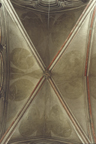 |
North vault, northeast transept
East wall is at bottom and north wall is at
left of image.
|
-
 |
Boss, north vault
|
-
-
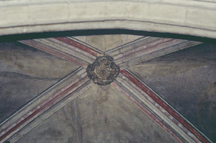
 |
Foliated boss
|
-
 |
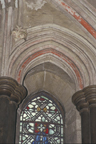
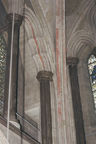
West wall, window opening
Detail of arched surround for main level window, west
wall. View taken from triforium of north wall.
|
-
 |
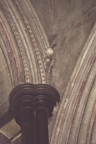
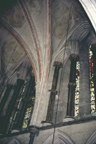
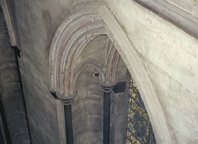
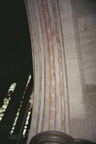
Trefoil arch, triforium
View of underside of trefoil arch in west triforium
above north aisle, bay 8. Polychromy on underside would have
been visible from ground level.
|
-
 |
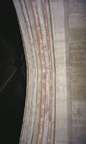
Underside of arch, triforium
Traces of red and green polychromy visible.
|
-
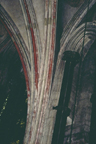
 |
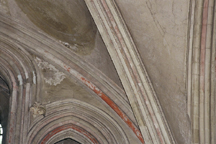
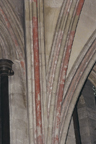
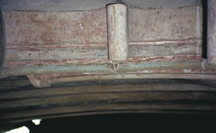
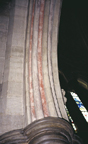
Triforium arches, north wall
Underside of mouldings on west half of triforium arch,
once painted. Clerestory of west wall is visible beyond.
|
-
 |
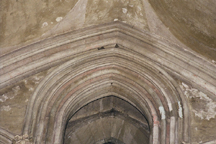
Triforium arches, north wall
Underside of pointed arch at triforium level.
|
-
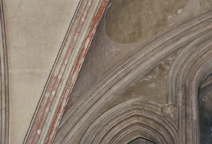
 |
Triforium arches, north wall
Underside of mouldings on east half of triforium arch.
Clerestory of east wall is visible beyond.
|
|