 
|
Loading...
-
MAIN TRANSEPT
-
Crossing bay
-
-
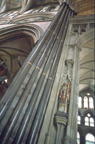 |
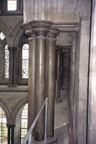
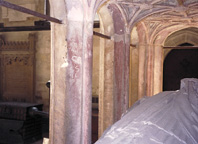
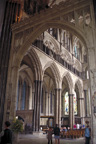
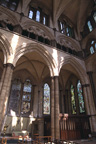
Southeast crossing pier
Purbeck shafts reaching from floor to main vault. To the
left is the south wall of the choir, and to the right is the south
strainer arch in bay 12, the crossing bay.
|
-
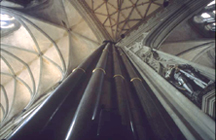 |
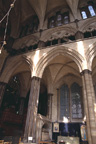
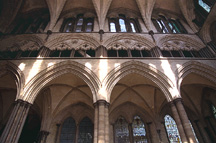
Northwest crossing pier
To the right is the north strainer arch in bay 12, the
crossing bay. The nave vaults extend to the left.
|
-
North Transept
-
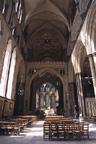 |
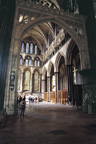
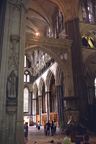
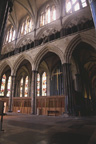
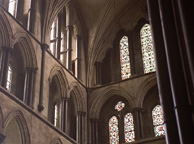
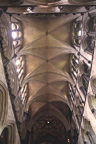
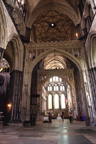
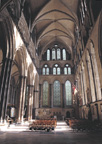
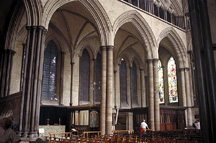
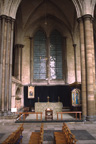
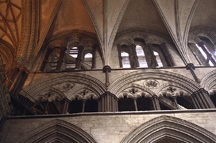
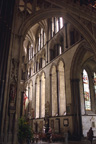
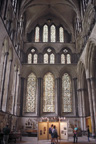
General view, north transept
Taken from south transept looking north through crossing
bay.
view plan
|
-
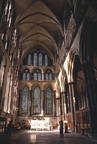 |
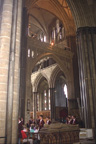
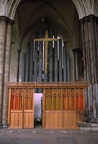
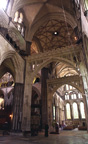
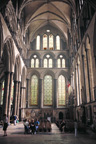
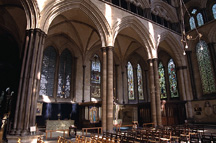
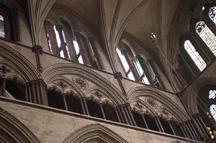
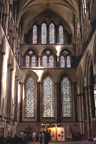
General view, north transept
Taken from crossing, looking at north wall of transept.
Note eastern chapels at right.
view plan
|
-
-
-
 |
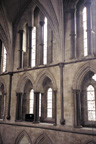
Triforium passage, north wall
View towards west wall along triforium
passage.
|
-
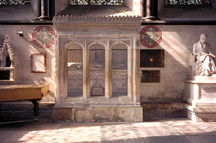 |
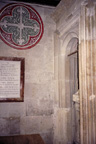
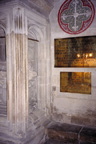
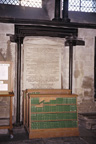
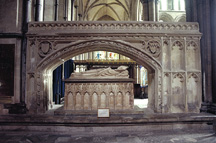
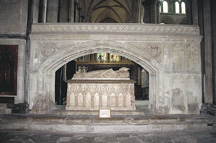
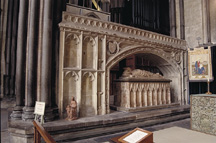
Monument to Bishop Blythe
Located at center of north wall. John Blythe was
Bishop 1494-99, and Chancellor of Cambridge University. Note
consecration crosses on wall at either side.
view plan
|
-
 |
Monument to Bishop Blythe
|
-
 |
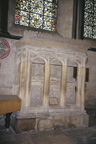
West end of Blythe tomb
|
-
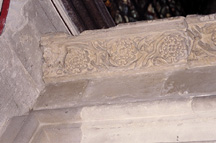 |
Detail of molding
At top of west end of Blythe
tomb.
|
-
 |
East end of Blythe tomb
|
-
 |
Interior vault, Blythe tomb
Some polychromy is visible on the
ribs.
|
-
 |
Interior vault, Blythe tomb
|
-
 |
Effigy, Bishop Blythe
Taken from the foot end.
|
-
 |
Tomb arcade
Detail of inner surface of tomb arcade.
Some traces of polychromy visible.
|
-
 |
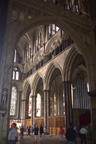
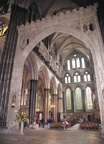
Eastern chapels, north transept
View taken from crossing bay, looking northeast towards
north transept chapels.
view plan
|
-
 |
Transept chapels seen from nave
View taken from bay 13, south aisle, looking northeast
through crossing.
view plan
|
-
 |
Transept chapels from crossing
View from crossing bay looking into north
transept.
view plan
|
-
 |
Transept chapels from crossing
Three chapels on east side of north transept, view from
crossing.
view plan
|
-
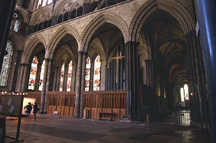 |
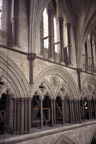
Transept chapels along east wall
Chapels in lower arcade, and north aisle extending
to the eastern end at right of image.
view plan
|
-
 |
Arcades of three eastern chapels.
|
-
 |
South and central transept chapels
North aisle extends to the eastern end at right
of image.
|
-
 |
View from above, south and central chapels
|
-
 |
South chapel, east wall
View taken towards east from main space in
transept. Chapel was dedicated to St. John the
Baptist.
|
-
 |
Central chapel, east wall
View taken towards the east from main space in
transept. Chapel was dedicated to St. Edmund of
Abingdon.
|
-
 |
Northern chapel, east wall
View taken towards east from main space in
transept. Chapel was dedicated to St. Thomas of
Canterbury.
|
-
 |
Interior view, north chapel
View inside chapel, north and east
walls.
|
-
 |
Interior view, north chapel
North wall of chapel.
|
-
 |
Interior view, north chapel
Eastern wall, north and part of central
chapels.
|
-
 |
Upper levels of elevation
Eastern wall, above entrance into north choir
aisle.
|
-
 |
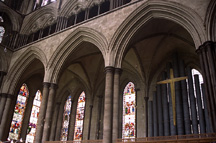
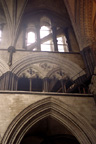
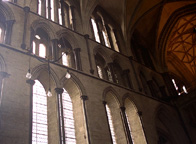
Upper levels of elevation
Eastern wall, above south chapel. Note tower
buttress in triforium level.
|
-
 |
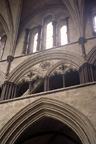
Detail, triforium level
Above south chapel. Note head of Bishop
between south and central chapels, and the
additional support for the tower and spire behind
the triforium arcade.
|
-
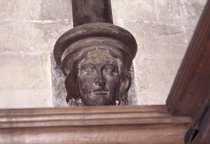 |
Detail, corbel head
Purbeck marble, located between central and
south chapels at the stringcourse above the chapel
wall.
|
-
 |
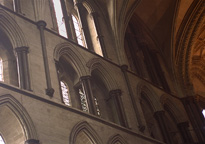
Upper levels of elevation
Above central chapel on east wall of north
transept.
|
-
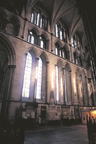 |
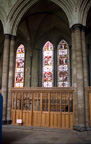
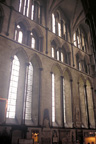
West wall, north transept
Taken looking northwest. Note that there is no aisle or
chapels along this wall.
view plan
|
-
-
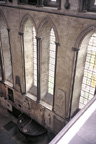 |
Windows at lower level, west wall
Taken from triforium in north wall, looking down
onto central bay of west wall.
|
-
 |
Upper levels of elevation, west wall
|
-
 |
Upper levels of elevation, central bay
Taken from triforium in north wall.
|
-
 |
Lower level, northwest corner of transept
Looking towards west and north walls.
|
-
 |
Upper levels, northwest corner of transept
Triforium and clerestory levels. Note passages at
both levels.
|
-
|
Triforium passage, north wall
View along north wall towards the west wall.
Note door in far corner to stair tower.
|
-
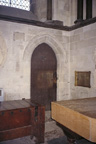 |
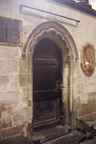
Door, lower level, west wall
Door in west wall at northwest corner leading
into stair tower.
|
-
 |
Lower level, west wall
Blocked door opening in west wall in
southernmost bay. Possibly never used.
|
-
 |
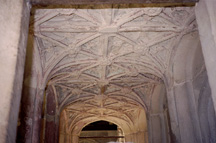
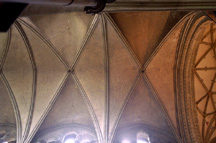
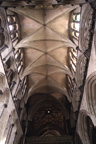
Vaults, north transept
Northernmost bay is at top of image, crossing is at bottom
of image.
view plan
|
-
 |
Vaults, north transept
North wall is at left of image.
view plan
|
-
 |
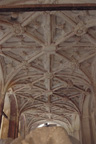
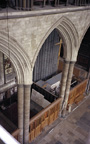
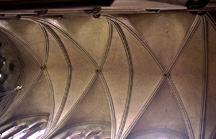
Vaults, north transept
Southern and central bays. Crossing vault is visible at
right.
view plan
|
-
South Transept
-
 |
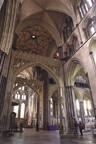
General view, south transept
Taken from north transept through the crossing towards
south.
view plan
|
-
 |
General view to southeast
Taken from north transept through
crossing.
view plan
|
-
 |
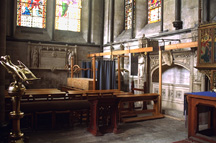
East and south walls, south transept
Showing chapels under east arcade. Taken from crossing
bay.
view plan
|
-
 |
General view to southwest
Taken from north transept and looking through
crossing.
view plan
|
-
 |
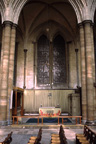
South wall, south transept
View from crossing.
view plan
|
-
 |
South wall, south transept
View from crossing.
view plan
|
-
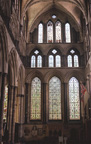 |
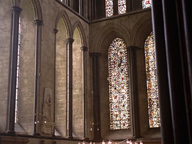
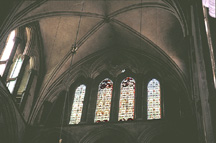
Windows, south wall, south transept
view plan
|
-
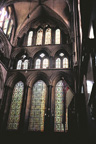 |
Windows, south wall, south transept
|
-
 |
Lower windows, south wall
Arcade and triforium levels.
|
-
|
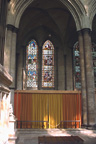
Eastern chapels, south transept
Taken from crossing, looking southeast.
view plan
|
-
 |
East chapels, south transept
Taken from crossing.
view plan
|
-
 |
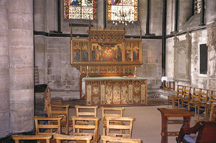
Arcades and three eastern chapels
Taken from the main aisle of south
transept.
view plan
|
-
 |
Arcades and three eastern chapels
Taken from main aisle of south
transept.
|
-
 |
North chapel, east wall and elevation above
View slightly to northeast, showing tomb between
south aisle and chapel (bottom, center of image). Entrance
to south aisle is at left of image.
|
-
 |
North chapel, east wall
Chapel is dedicated to St.
Margaret.
|
-
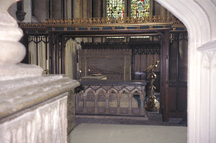 |
Tomb of John Henry Jacob, d. 1862
A table tomb located in between the north
and central chapels. This view looks south through
the chapels, showing the northern side of the
tomb.
|
-
 |
Jacob tomb
South side of the tomb, view taken from the
central chapel looking slightly
northeast.
|
-
 |
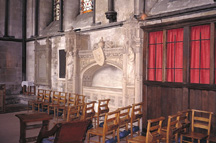
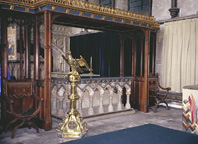
Tomb of Bishop Richard Medford, d. 1407
Located between south aisle and north chapel of
south transept. This view is taken from the aisle,
showing north side.
|
-
 |
North side, Medford tomb
|
-
 |
South side, Medford tomb
This side is visible from the northernmost
chapel.
|
-
 |
Central chapel, east wall
View taken directly east from the main aisle of
transept. Chapel dedicated to St. Lawrence.
|
-
 |
Monument of Bishop Fisher, d. 1825
Located between the central and southern
chapels. This view is taken from the central chapel,
showing north side of monument.
|
-
 |
Fisher monument
North side, taken from northernmost
chapel.
|
-
 |
South chapel, east wall
View into chapel from main aisle of transept.
Chapel is dedicated to St. Michael.
|
-
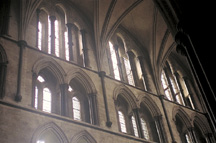
 |
Elevation, center and south chapels
Arcade, triforium, clerestory levels.
|
-
 |
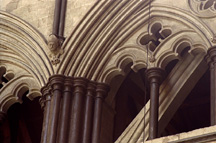
Upper elevation, east wall
Showing triforium and clerestory over the three
eastern chapels and the south aisle (at
left).
|
-
 |
Upper elevation, east wall, detail
Triforium and clerestory over entrance to
south choir aisle (left) and over northernmost
chapel (right). Note buttresses for the tower and
spire.
|
-
 |
Upper elevation, east wall, detail
Triforium and clerestory over central
chapel (left) and southern chapel (right). South
wall of transept is visible at far
right.
|
-
 |
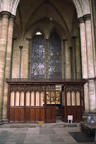
West wall, south transept
Taken from crossing bay. Entrance to south aisle of nave is
to right of image.
view plan
|
-
 |
Elevation, west wall
Taken from south end of transept, looking northwest at
north and central bays of west wall. Note passage at triforium
level.
view plan
|
-
 |
Triforium level in middle
North and central bays of west wall, south
transept.
|
-
 |
Door, west wall
In southernmost bay, opposite south chapel. Leads
to the plumbery.
view plan
|
-
 |
Vaults, south transept
Southernmost bay at top of image, crossing at bottom of
image.
view plan
|
-
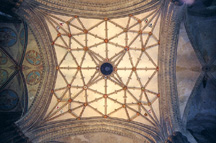
 |
Vault, southernmost bay, south transept
South wall of transept is at bottom of
picture.
view plan
|
|