 
|
Loading...
-
NAVE
-
General views of nave
-
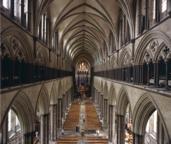 |
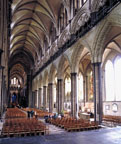
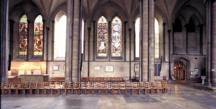
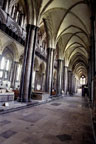
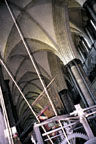
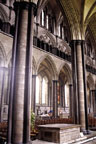
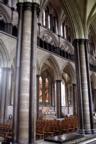
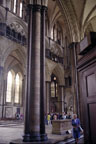
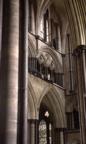
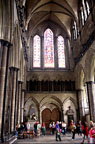
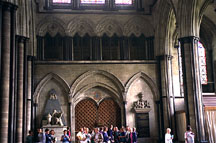
General view of nave to the east
View taken from triforium level at west end of bay 22.
Trinity Chapel is visible at far end.
view plan
|
-
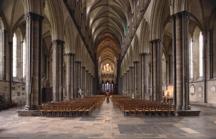 |
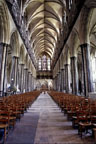
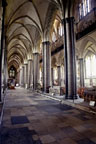
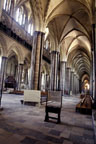
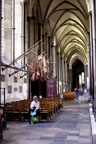
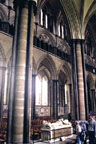
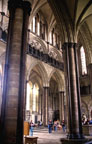
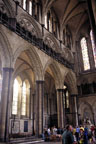
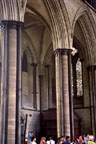
General view of nave to the east
Taken from floor level of bay 22. Trinity Chapel is
visible in distance.
view plan
|
-
 |
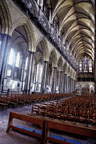
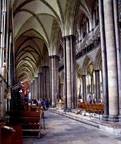
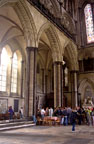
General view of nave to the east
Taken from bay 19 looking to the east.
view plan
|
-
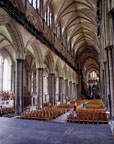 |
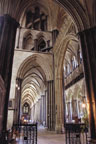
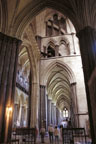
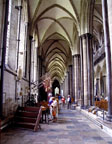
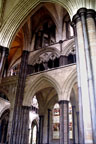
North side of nave, looking east
View to northeast, showing north arcade and north
aisle. Taken from bay 22.
view plan
|
-
 |
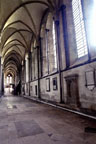
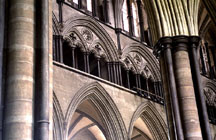
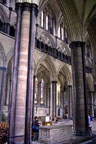
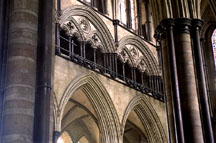
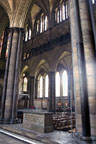
South side of nave, looking east
View to southeast, showing south arcade and south
aisle. Taken from bay 22.
view plan
|
-
 |
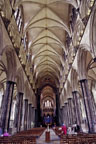
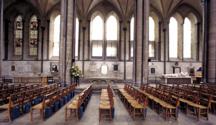
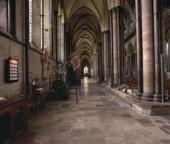
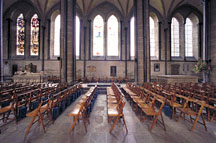
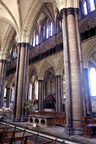
General view of nave to the west
View taken from floor level, crossing bay 12, towards west
end of cathedral. North and south nave aisles are visible at right
and left of image.
view plan
|
-
 |
General view of nave to the west
View down center of nave towards west doors, taken from
crossing bay 12.
view plan
|
-
 |
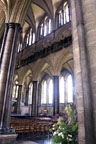
South side of nave, looking west
View taken from bay 12 towards southwest, showing south
arcade and south aisle.
view plan
|
-
 |
North side of nave, looking west
View taken from bay 12 towards northwest, showing north
arcade and north aisle.
view plan
|
-
South nave aisle
-
 |
Transept entrance to south nave aisle
Transept side of bay 13, looking west. View taken from bay
11 through bay 12 (crossing is to the right of image), into the
south nave aisle.
view plan
|
-
 |
South aisle view to west
Taken from bay 13, looking towards west wall.
view plan
|
-
 |
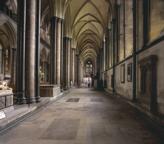
South aisle view to west
View down center of south aisle.
view plan
|
-
 |
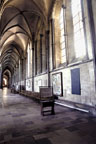
South aisle, south side.
View from bay 13 to southwest, showing south wall of
south aisle, and south aisle window in west front.
view plan
|
-
 |
South aisle, north side.
View to northwest from bay 13. Central aisle of nave is
visible through the arcade.
view plan
|
-
 |
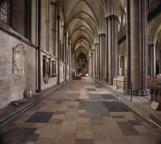
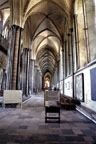
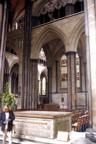
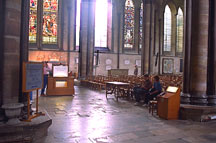
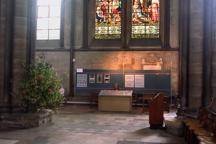
South aisle view to east
Taken from bay 22. Hertford monument is visible at eastern
end of south aisle.
view plan
|
-
 |
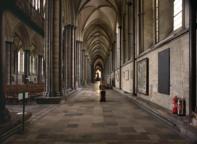
South aisle view to east
View to east down center of south aisle, taken from bay
21. Hertford monument is visible at far eastern end of
aisle.
view plan
|
-
 |
South aisle, north side.
View taken from bay 22 to the northeast. Central aisle
of nave is visible through arcade.
view plan
|
-
 |
South aisle, south side.
View taken from bay 22 to the southeast. Shows south
wall of south aisle.
view plan
|
-
 |
South aisle from nave, bays 14, 15 and 16
View from the nave through the south arcade towards south
wall. Bay 14 is at left of image; bay 16 at right.
view plan
|
-
 |
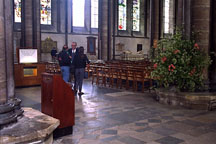
South aisle, bays 19, 20, 21
View taken from nave looking directly south. Bay 19 is at
left, bay 20 in center, bay 21 at right. Note entry in bay 22 at far
right to cloisters.
view plan
|
-
North nave aisle
-
 |
Transept entrance to north nave aisle
Transept side of bay 13, looking west from bay 11 through
bay 12 (crossing is at left of image) and into north nave
aisle.
view plan
|
-
 |
North nave aisle view to west
Taken from bay 13.
view plan
|
-
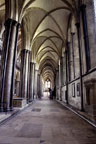 |
North aisle view to west
View down center of north aisle towards west window.
Taken from bay 12.
view plan
|
-
 |
North aisle, south side
View to southwest looking into nave from north aisle
through north arcade. Taken from bay 12.
view plan
|
-
 |
North aisle, north side
View to northwest showing north wall of north aisle.
Taken from bay 12.
view plan
|
-
 |
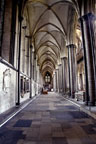
North nave aisle view to east
Taken from bay 21. Gorges monument is visible at eastern
end of the aisle.
view plan
|
-
 |
North aisle view to east
View down center of north aisle towards east window.
Taken from bay 21.
view plan
|
-
 |
North aisle, north side
View to northeast showing north wall of north aisle.
Taken from bay 21.
view plan
|
-
 |
North aisle, south side
View to southeast looking into the nave through the
north arcade.
view plan
|
-
 |
North aisle from nave, bays 16, 15 and 14
Taken from nave through the north arcade to the north wall.
Bay 16 is at left of image, bay 15 in center, and bay 14 at
right.
view plan
|
-
 |
North aisle from nave, bays 22 to 18
View from nave looking through north arcade towards north
wall. Bay 22 is at left, and bay 18 at right.
view plan
|
-
Nave vaults
-
|
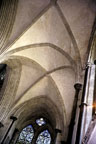
Central nave vaults, bay 18 to east
view plan
|
-
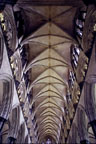 |
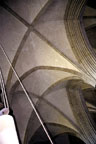
Central nave vaults, bay 13 to bay 22
View of all of the nave vaults taken from the crossing to
the west wall. Bay 13 is at top of image and bay 22 at bottom of
image.
view plan
|
-
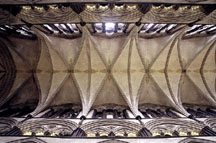 |
Central nave vaults, bays 13 to 17
Bay 13 at left of image and bay 17 at
right.
view plan
|
-
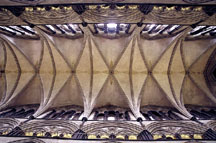 |
Central nave vaults, bays 18 to 22
Bay 18 at left of image and bay 22 at
right.
view plan
|
-
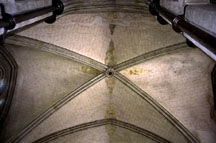 |
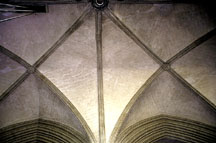
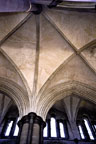
Nave vault, bay 22
West wall of nave is at top of image.
view plan
|
-
 |
North aisle vaults, bays 20 to 15
Taken from bay 20, looking east down north nave
aisle.
view plan
|
-
 |
North aisle vaults, bays 13 to 15
View taken from east to west. Bay 13 is at top of image
and bay 15 at bottom.
view plan
|
-
 |
North aisle vaults, bays 19, 20
Bay 20 is at top of image, bay 19 at bottom. North nave
arcade arches are visible to the right.
view plan
|
-
 |
North aisle vaults, bays 20, 21
Nave arcade arches are visible at bottom of image. Bay
20 is at left of image, bay 21 at right.
view plan
|
-
 |
North aisle vaults, bays 21, 22
View from bay 21 (vault at top of image) towards
westernmost bay 22.
view plan
|
-
 |
South aisle vaults, bays 16 and 15
South aisle vaults, looking north towards north clerestory
of nave (at bottom of image). Bay 16 is at left and bay 15 at right
of image.
view plan
|
-
Bay 13
-
 |
South arcade, bay 13, view from north
South arcade, bay 13, is visible in center of image. View
is taken from north aisle, bay 14 (tomb in north arcade, bay 14, is
in foreground).
view plan
|
-
 |
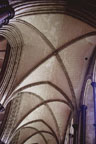
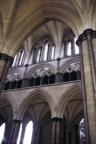
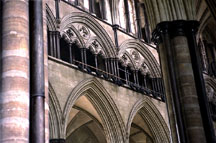
Triforium and clerestory, south arcade, bay 13
View taken from north aisle, bay 14, looking south
towards upper levels of bay 13.
view plan
|
-
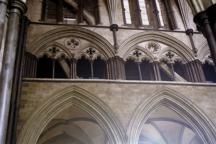 |
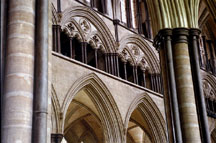
Triforium level, south arcade, bays 13 and 14
Taken from nave.
view plan
|
-
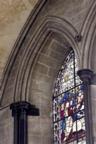 |
South aisle window, south wall
East light of south aisle window, bay 13.
view plan
|
-
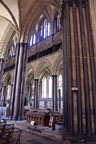 |
South arcade, bay 13, view from south
Piers and tomb in south arcade, general view to northwest
from south aisle. North arcade of bay 15 is visible through south
bay 13 arcade.
view plan
|
-
 |
Detail of crossing pier, bay 13
Purbeck shafts and bases on west side of crossing pier,
south arcade, bay 13.
view plan
|
-
 |
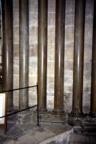
Step up to sleeper wall, bay 13
Taken from south aisle. Step up is visible in front of
pier at west side of bay 13.
view plan
|
-
 |
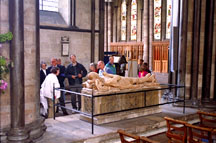
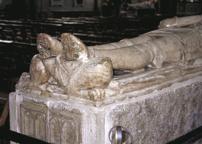
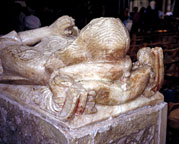
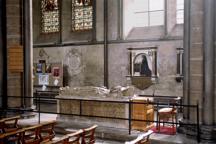
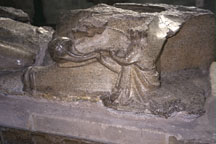
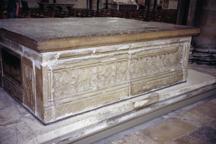
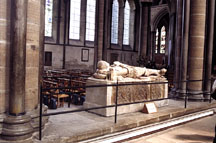
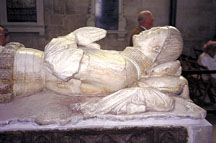
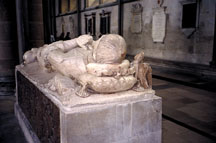
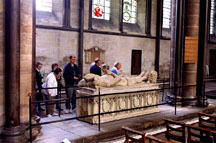
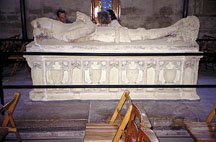
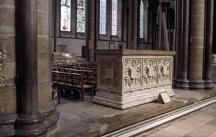
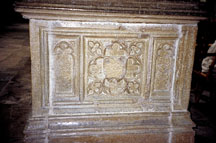
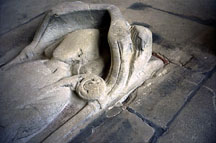
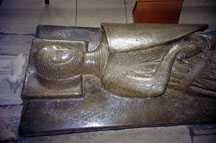
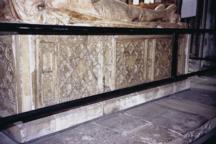
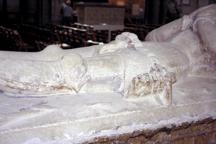
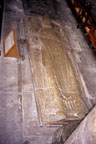
Tomb of William Longespee from south
View taken from south aisle, showing south and west
sides of tomb. Tomb dates to c.1226. Wooden base, Tournai marble
effigy. Originally erected on stylobate in Trinity Chapel; moved
to nave in 1789.
view plan
|
-
 |
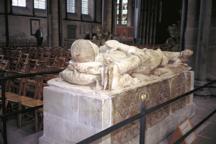
Tomb of Longespee from south aisle
View taken from south aisle, showing south and west
sides of tomb.
view plan
|
-
 |
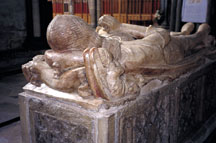
Tomb of Longespee from southwest
View taken from south aisle by western pier in bay
13, showing south and west sides of tomb.
view plan
|
-
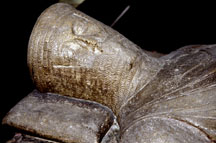 |
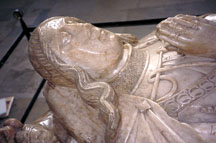
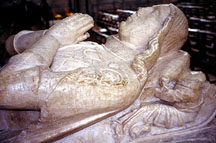
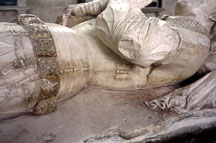
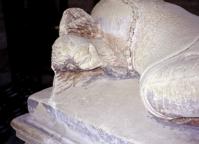
Detail of head, south side
|
-
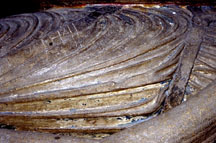 |
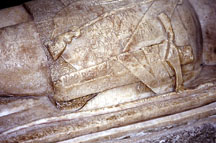
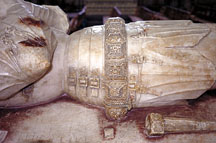
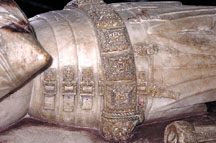
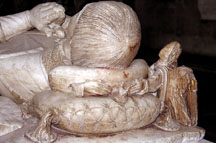
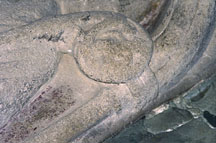
Detail of girdle, south side
|
-
 |
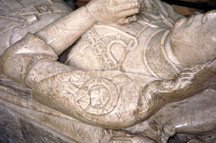
Detail of gloved hand, south side
|
-
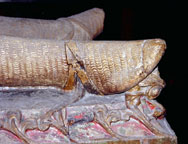 |
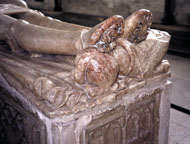
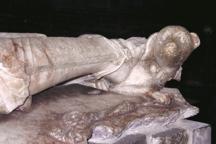
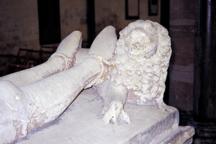
Detail of right foot, from south
|
-
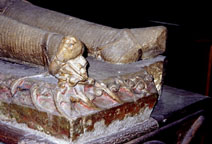 |
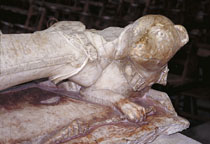
Detail of feet from southeast
|
-
 |
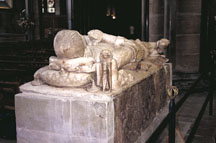
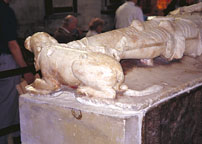
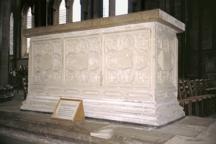
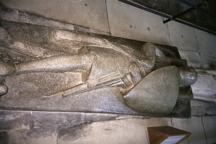
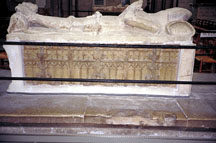
Tomb of William Longespee from north
View taken from nave showing north and west sides of
tomb.
view plan
|
-
 |
Detail of shield, north side
|
-
 |
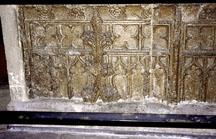
Base, north side
|
-
 |
Detail of base
|
-
 |
Detail of base
|
-
 |
Detail of base, west end
|
-
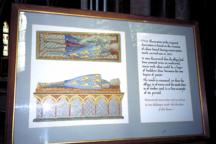 |
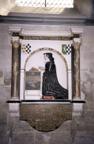
Reconstruction of color scheme, Longespee tomb
Created by Ann Ballantyne and placed next to
tomb.
|
-
 |
North arcade, bay 13, view from south
View taken from south aisle through south arcade of bay 14.
South side of north arcade, bay 13, is visible in center of
image.
view plan
|
-
 |
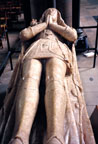
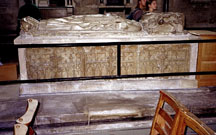
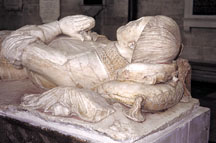
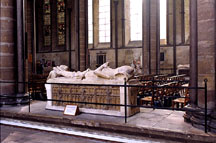
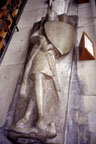
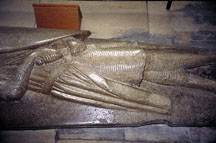
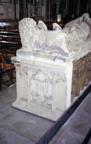
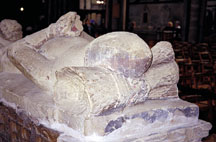
Tomb of Sir John Cheney from south
View taken from nave, showing southwest view of tomb.
Cheney was the standard bearer of Henry of Richmond at the
Battle of Bosworth, 1455. Tomb dates to 1509, and was formerly
placed within the Beauchamp Chantry chapel. Effigy is of
alabaster.
view plan
|
-
-
 |
Angel supporting pillow and head
Southwest corner of effigy
|
-
 |
Detail of angel, south side
|
-
 |
Head of Sir John Cheney
West end of effigy.
|
-
 |
Detail of girdle, south side
|
-
 |
Feet, from southeast
|
-
 |
Legs, view from east
|
-
 |
Tomb of Sir John Cheney from north
View taken from north aisle, showing north and east
sides of tomb.
view plan
|
-
-
 |
Cheney effigy from north
|
-
 |
Feet resting on dog
View taken from northeast.
|
-
 |
Detail of sword, north side
|
-
 |
Detail, upper torso, north side
|
-
 |
Detail, Order of the Garter, north side
|
-
 |
Detail, head resting on pillow with angels
View taken from northwest.
|
-
 |
Detail, head resting on pillow with angels
View taken from northwest.
|
-
Bay 14
-
 |
South arcade, bay 14, view from south
View is taken from south aisle, looking through the south
arcade of bay 14. North arcade of bay 16 is in the center background
of image.
view plan
|
-
 |
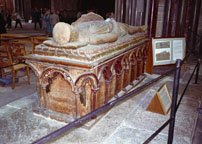
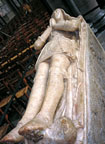
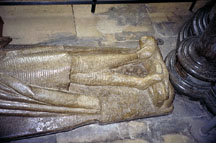
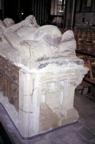
Tomb of Bishop Walter de la Wyle, from south
View taken from south aisle, showing southwest corner
of tomb. Walter de la Wyle was Bishop of Salisbury from 1263 to
his death in 1271. He founded St. Edmund's Church and College.
Purbeck marble effigy.
view plan
|
-
 |
Wyle tomb, from south
Effigy and base.
view plan
|
-
 |
Detail of base, south side
|
-
 |
Wyle effigy from east end
|
-
 |
Tomb of Bishop Walter de la Wyle, from north
View taken from nave, looking towards south aisle
wall.
view plan
|
-
 |
Wyle tomb, north side
Effigy and base
view plan
|
-
 |
Detail of base, north side
East segment
|
-
 |
Wyle effigy from east end
|
-
 |
Detail, beasts under Bishop's feet
At east end of effigy, taken from
north.
|
-
 |
Detail, head of Bishop
At west end of effigy, taken from
north.
|
-
 |
Angel censing
Located on west end of effigy at Bishop's
head.
|
-
 |
Monument to Elihonor Sadler
Located on south wall of south aisle, bay 14. Dated
1622, made of painted stone.
view plan
|
-
 |
North arcade, bay 14, view from north
View taken from north aisle, looking through the north
arcade of bay 14, with tomb in foreground. In center background is
south arcade, bays 16 and 17.
view plan
|
-
|
North arcade, bays 16, 15, and 14, view from south
View taken from nave through north arcade towards north
wall. Bay 15 is in center, bay 16 at left, and bay 14 at right
of image.
view plan
|
-
 |
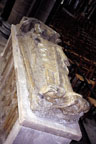
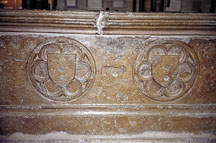
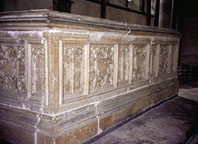
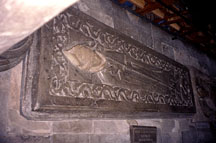
Tomb of Walter, 1st Lord Hungerford, and Catherine Peverell,
from south
Southeast corner of tomb, as seen from nave. Lord
Hungerford died in 1449; tomb was reconstructed with fragments
in 1779.
view plan
|
-
 |
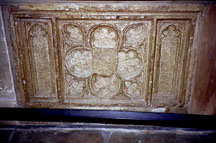
Hungerford tomb, south face of base
Viewed from nave.
view plan
|
-
 |
Hungerford tomb, east face of base
|
-
 |
Tomb of Walter, first Lord Hungerford, and Catherine
Peverell, from north
View taken from north aisle, showing northwest corner
of tomb.
view plan
|
-
 |
Hungerford tomb, north face of base
Taken from north aisle.
view plan
|
-
 |
Hungerford tomb, west face of base
|
-
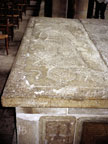 |
Hungerford tomb, top slab
South slab, taken from east. Shows missing brass
indent.
|
-
 |
Hungerford tomb, top slab
North slab, taken from east. Shows missing brass
indent.
|
-
Bay 15
-
 |
South arcade, bay 15, from south
View taken from south aisle, looking through south arcade
of bay 15, with tomb in foreground. The north arcade of bays 18, 17
and 16 are pictured between the piers in the
background.
view plan
|
-
|
South aisle vaults, bays 16 and 15
View taken from south aisle; north nave clerestory is
visible at bottom of image. Bay 15 is to the right of image and
bay 16 at left.
view plan
|
-
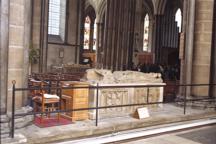
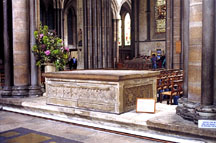
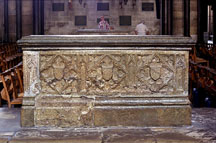
 |
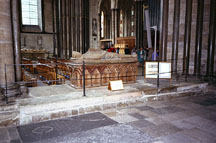
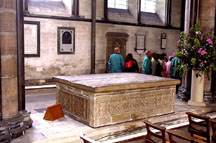
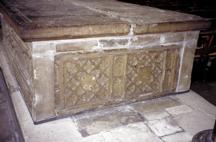
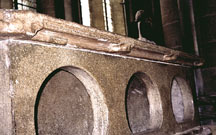
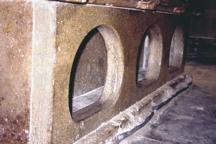
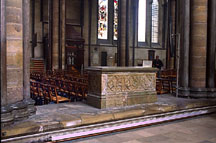
Base of shrine of St. Osmund, from south
View taken from south aisle, showing southwest corner
of base. Osmund was Bishop of Old Sarum from 1078 to 1099, and
was canonized in 1457. Since this photo was taken, the base has
been relocated on the south sleeper wall of the Trinity
Chapel.
view plan
|
-
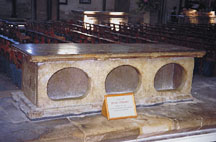 |
Osmund shrine base, south side
Note holes through which pilgrims could reach to
get closer to the canonized remains.
view plan
|
-
 |
Osmund shrine base, southeast corner
view plan
|
-
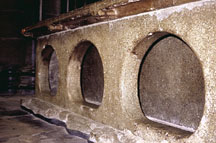 |
Detail, south side of shrine base
Showing holes in base.
|
-
 |
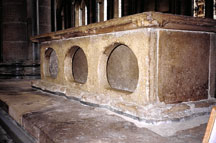
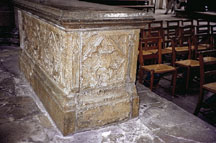
Base of shrine of St. Osmund, from north
View taken from nave looking into south aisle, showing
north and west sides of shrine base.
view plan
|
-
 |
Osmund shrine base, north side
Detail view from nave
view plan
|
-
 |
Osmund shrine base, northeast corner
view plan
|
-
 |
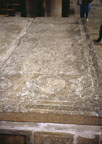
Top slab of Osmund shrine base
View taken from east end.
|
-
 |
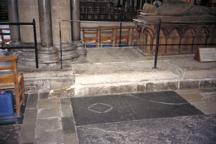
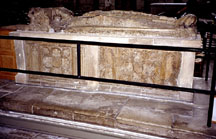
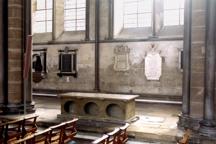
Sleeper wall with tomb base removed
The tomb base was relocated c.2000 to the sleeper wall
between the Trinity Chapel and chapel at the east end of the
south aisle, its previous position before placement in the nave
in 1789. For images of the base in its current location, look in
the archive under TRINITY CHAPEL.
|
-
 |
North arcade, bays 16, 15, and 14, from south
View taken through south arcade, looking north to north
arcade and into north aisle. Bay 16 is at left of image, bay 15 in
center, and bay 14 at right.
view plan
|
-
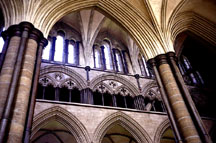 |
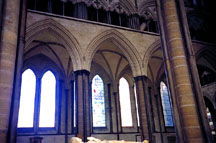
Triforium and clerestory, north arcade, bays 16 and 15
Seen through south arcade (in foreground). Bay 16 is at
left, bay 15 in center, bay 14 at right behind
pier.
view plan
|
-
 |
Clerestory, north arcade, bays 16 and 15
Bay 16 is at left, bay 15 at right of image. Arch at
top of image in foreground is part of the south
arcade.
view plan
|
-
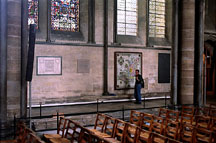
 |
Brass, view from south
Taken from nave looking towards north aisle wall. Brass
is copied from one in the northeast transept.
view plan
|
-
 |
Brass, view from north
Taken from north aisle, looking south into
nave.
view plan
|
-
Bay 16
-
|
South arcade, bay 16, view from north
North side of south arcade, bay 16, visible in center of
image. View is taken from north aisle, bay 14, through north arcade
towards southwest.
view plan
|
-
 |
Triforium level, south arcade, bays 16 and 17
Bay 16 is on left. View taken through north arcade from
bay 14.
view plan
|
-
 |
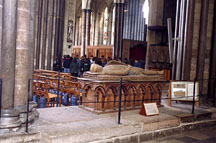
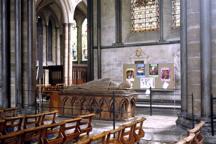
Tomb of Robert, Lord Hungerford, from south
South side of tomb, seen from south aisle. Hungerford
died in 1459. Tomb was previously placed in the Hungerford
Chantry chapel, but was moved to the nave in 1789. Tomb chest is
reconstructed from fragments; effigy is alabaster.
view plan
|
-
 |
Hungerford Tomb, from southwest
Effigy and base.
view plan
|
-
 |
Hungerford Tomb, from southwest
Effigy and base.
|
-
 |
Detail, girdle, south side.
|
-
 |
Detail of girdle, south side
|
-
 |
Dog supporting feet, south side
|
-
 |
Detail of dog, south side
|
-
 |
Dog from west end
|
-
 |
Hungerford effigy from southwest
|
-
 |
Legs from west end
|
-
 |
Tomb of Robert, Lord Hungerford from north
View taken from nave
view plan
|
-
 |
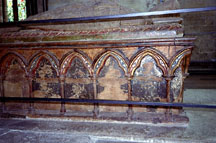
Hungerford tomb, from north
View of effigy and base
view plan
|
-
 |
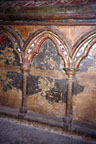
Detail of mid-torso from north
|
-
 |
Detail of upper torso from north
|
-
 |
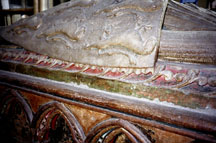
Detail of head
|
-
 |
Head and upper torso from northwest
|
-
 |
West end of effigy; head, pillows and angels
|
-
 |
Detail, pillows and angels from west
|
-
|
North arcade, bay 16, from south
Bay 16 is in center of image. View is taken from south
aisle, through south arcade, bay 14.
view plan
|
-
 |
Triforium level, bays 18, 17 and 16
Bay 17 is in center, bay 16 partially hidden by pier at
right of image.
view plan
|
-
 |
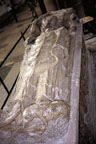
Tomb of Sir John de Montacute, south side
View taken from nave, showing southwest corner of
tomb.Montacute (d. 1390) was the second son of the Earl of
Salisbury. Tomb chest and effigy are of carved sandstone; effigy
was originally painted and gilded.
view plan
|
-
 |
Montacute Tomb, from south
Effigy and base.
view plan
|
-
 |
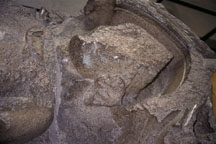
Head from south
|
-
 |
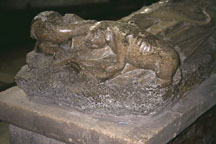
Lion at feet from south
|
-
 |
Tomb of Sir John de Montacute, from north
View from north aisle.
view plan
|
-
Bay 17
-
 |
South arcade, bay 17, view from north
View taken from north aisle, looking through north arcade
of bay 15 towards southwest. North side of south arcade, bay 17, is
in center of image.
view plan
|
-
 |
Triforium level, bays 17 and 18
Bay 17 is to the left of the image.
view plan
|
-
 |
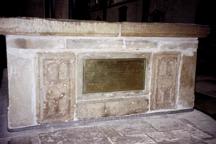
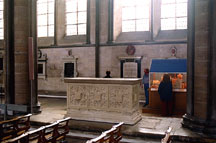
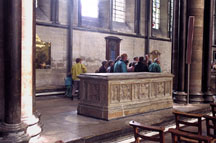
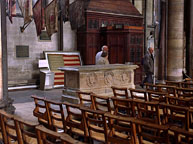
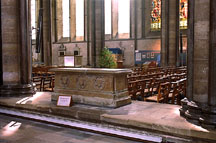
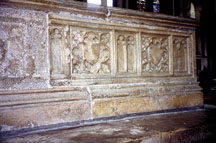
Tomb of Bishop Richard Beauchamp, south side
View taken from south aisle, showing southwest view.
Beauchamp was Bishop at Salisbury from 1450 until his death in
1481. A purbeck altar table serves as the top of tomb, and the
tomb chest seen here was reconstructed in 1789 when his original
tomb in the Beauchamp chantry chapel was
destroyed.
view plan
|
-
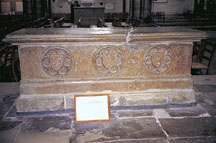
 |
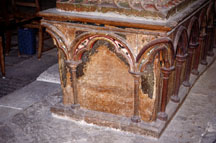
Tomb of Richard Beauchamp from south
Tomb base.
view plan
|
-
 |
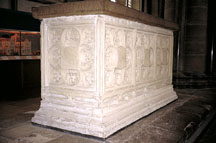
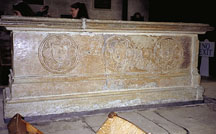
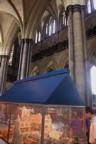
Tomb of Bishop Richard Beauchamp, north side
View taken from nave. Model of cathedral in
background.
view plan
|
-
 |
Tomb of Beauchamp from northeast
Northeast corner of base.
view plan
|
-
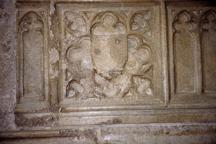
 |
Detail, panel of tomb base
North side.
|
-
|
North arcade, bay 17, view from south
South side of north arcade, bay 17, is in center of image.
View is taken from south aisle, through arcade at bay 15, towards
northwest. North porch entrance is seen on north wall, behind arcade
of bay 17.
view plan
|
-
|
Triforium level, bays 18, 17 and 16.
Bay 17 is in center, bay 18 at left and bay 16 at right
of image.
view plan
|
-
 |
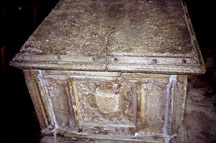
Unidentified burial, from south
View taken from nave, showing southwest corner of
tomb.
view plan
|
-
 |
Unidentified burial, from north
View taken from north aisle, showing northwest
corner.
view plan
|
-
-
 |
Shield in north side of base
At left side
|
-
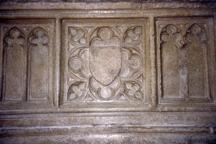 |
Shield in north side of base
At right side
|
-
 |
Top slab, unidentified tomb
North side of top slab
|
-
 |
East end of unidentified tomb
Showing base and top slab
|
-
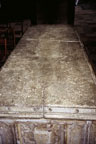 |
Top slab, unidentified tomb
East end of slab
|
-
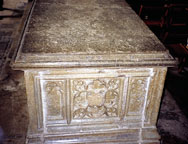 |
West end of unidentified tomb
Showing base and top slab
|
-
 |
Detail, west end of base
|
-
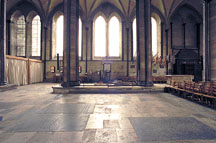
Bay 18
-
 |
South arcade, bay 18, view from north
Arcade, triforium, and clerestory of bays 18 and 19 are
visible through the north arcade of bay 16. Montacute tomb is in the
foreground.
view plan
|
-
 |
Triforium and clerestory, bays 18 and 19
View taken from north aisle looking through north
arcade. Bay 18 is at left of image.
view plan
|
-
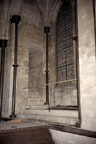
 |
South arcade, bay 18
The north porch opens into bay 18, so the sleeper wall
between the arcade piers is interrupted to facilitate access to
the nave. This view is taken towards bays 18, 19 and 20 of the
south aisle from the north aisle of bay 18.
view plan
|
-
 |
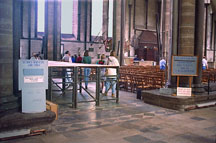
South arcade, bay 18
Taken from the nave looking directly south into the
south aisle of bay 18. Information desk is located here (across
from the north porch entrance).
view plan
|
-
 |
North arcade, bay 18
View is taken from the south aisle, looking through the
south arcade towards the north arcade. Bay 18 is framed in the
center of the image. The Hungerford tomb, bay 16, is in the
foreground.
view plan
|
-
 |
Bay 18
Image taken from the south aisle of bay 18 to the
northeast, showing north arcade bays 17 and 16 in the distance.
North arcade bay 18 would be at left of image. Note lack of
sleeper wall between the arcade piers in this bay, to allow
passage for visitors using the north porch entrance in bay
18.
view plan
|
-
 |
North porch entrance, bay 18
Taken from nave looking into the north aisle. The entry
leads to the north porch.
view plan
|
-
Bay 19
-
 |
South arcade, bay 19
View through north arcade of bay 17 towards south arcade,
showing arcade, triforium, and clerestory of bay 19 at left and bay
20 at right.
view plan
|
-
 |
South triforium, bays 19 and 20
View taken from north arcade towards south
arcade.
view plan
|
-
 |
South arcade, unidentified tomb, from south
View taken from south aisle towards
northeast.
view plan
|
-
 |
South arcade, unidentified tomb, from north
Northwest corner of tomb. Image taken from nave.
Information desk in bay 18 visible at left.
view plan
|
-
 |
North arcade, bay 19
View taken from south aisle, looking through arcade piers
of bay 17, towards bay 19 of the north arcade
(centered).
view plan
|
-
|
North arcade, bays 22 to 18
View taken from nave into north aisle. Bay 22 is at
left, bay 18 at right.
view plan
|
-
 |
William Geoffrey tomb, from south
View taken from nave, showing southwest corner of tomb.
Entry to north porch is in background. William Geoffrey was
Chancellor from 1554-1558.
view plan
|
-
 |
Geoffrey tomb, from south
South side of tomb.
view plan
|
-
 |
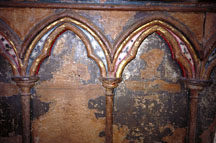
Detail, Geoffrey tomb
South side.
|
-
 |
William Geoffrey tomb, from north
View taken from north aisle, showing northwest
corner.
view plan
|
-
 |
Geoffrey tomb, from north
North side of tomb.
view plan
|
-
 |
Detail, Geoffrey tomb
North side.
|
-
Bay 20
-
 |
South arcade, bays 20, 21
View is taken through the north arcade, bay 18, looking
towards south arcade. Bay 20 is at left and bay 21 at
right.
view plan
|
-
 |
Triforium level, bays 20, 21
Taken through north arcade, looking towards
south.
view plan
|
-
 |
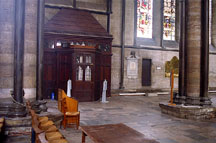
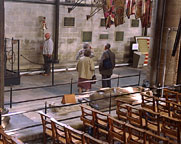
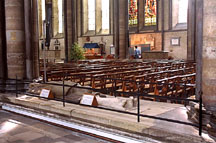
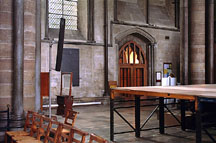
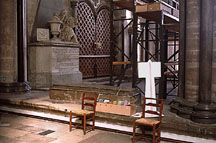
South aisle, bay 20
View taken from nave. Just beyond the chairs resting on
the sleeper walls are two effigies.
view plan
|
-
|
South aisle, bays 19, 20, 21
View taken from nave looking directly south. Bay 19
is at left, bay 20 in center, bay 21 at right. Note entry in
bay 22 at far right to cloisters.
view plan
|
-
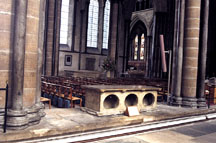
 |
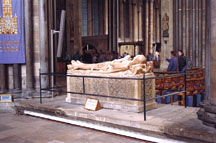
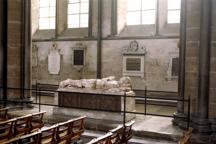
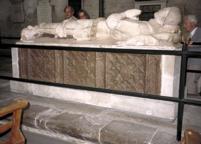
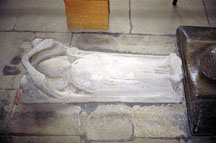
Effigies, Bishop Roger and St. Osmund
View taken from south aisle, looking north. Effigy
slabs rest almost directly on sleeper wall. Effigy at left is
attributed to Bishop Roger (d. 1139); right is attributed to St.
Osmund (Bishop 1078-99). Since this picture was taken, Osmund's
effigy has been moved to the center of the Trinity
Chapel.
view plan
|
-
-
 |
Detail, effigy, Bishop Roger
West end of effigy. Head and mitre have been
restored.
view plan
|
-
 |
Detail, effigy, Bishop Roger
East end of effigy.
|
-
-
 |
Detail, effigy, St. Osmund
West end of effigy.
|
-
 |
Detail, effigy, St. Osmund
East end of effigy.
|
-
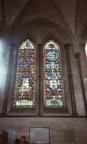 |
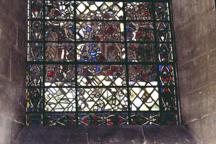
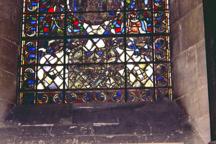
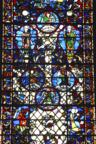
Glass, south aisle, bay 20
Left panel contains Tree of Jesse panels; right panel
is composed of glass reused from the chapter
house.
view plan
|
-
 |
Left lancet, lowest panel
|
-
 |
Right lancet, lowest panel
|
-
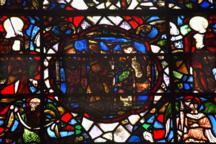 |
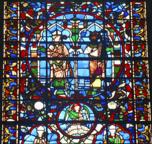
Right lancet, Adoration of the Magi
From Tree of Jesse panels.
|
-
 |
Right lancet, two bishops and angels
|
-
 |
Right lancet, bishop and king in rondel
|
-
 |
North arcade, bay 20
View taken from south aisle, with cathedral model in
foreground. Bay 20 is centered through the arcade.
view plan
|
-
 |
North aisle, bay 20
View taken from nave, looking northeast. Effigies on
sleeper wall are visible.
view plan
|
-
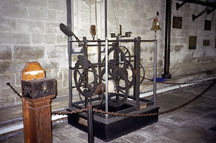 |
Medieval clock, north aisle, bay 20
Located against north wall of bay. Dates possibly
to the late 14th century. Formerly located in the separate
belfry (destroyed c. 1790).
view plan
|
-
 |
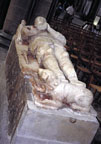
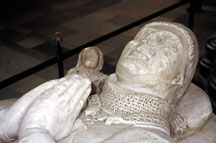
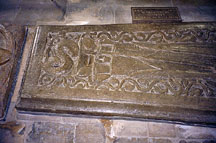
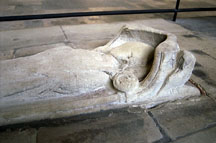
Effigies, Bishop Corner and William Longespee
Effigy at right of image is possibly a small
commemorative effigy attributed to Bishop William de la Corner.
Effigy to the left is attributed to William Longespee, the
younger, d. 1250. Image is taken from the north aisle looking
southeast.
view plan
|
-
-
 |
Detail, Corner effigy
South side.
|
-
-
 |
Detail, Corner effigy
Taken from north.
|
-
 |
Detail, Corner effigy
Taken from north.
|
-
 |
Detail, Corner effigy
Taken from north.
|
-
 |
Detail, Corner effigy, crosier
North side.
|
-
 |
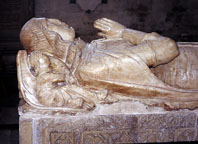
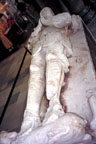
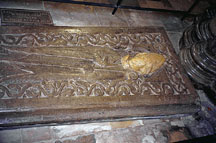
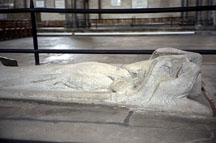
Effigy, William Longespee
Effigy is of purbeck marble.
view plan
|
-
 |
Effigy, William Longespee
|
-
 |
Detail, Longespee effigy
West end of effigy, taken from
south.
|
-
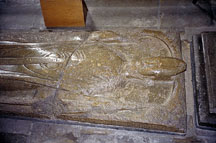
 |
Detail, Longespee effigy
Torso of effigy, taken from
south.
|
-
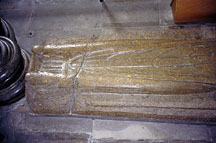
 |
Detail, Longespee effigy
East end of effigy, seen from
south.
|
-
Bay 21
-
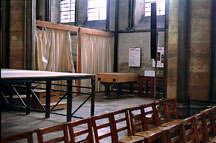
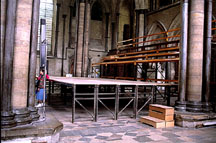 |
South arcade, bay 21
Taken from the north aisle of bay 21, looking southwest.
Bays 21 and 22 of south arcade are visible beyond the platform
(erected for concerts during the Salisbury Festival). The sleeper
walls between the arcade piers are interrupted in bay 21 for passage
across the nave.
view plan
|
-
 |
South arcade, bay 21
View taken from nave looking into the south aisle
between the south arcade piers. Doorway at right is the entrance
to the cloister, in bay 22.
view plan
|
-
 |
View from south arcade, bay 21
Image is taken from the south aisle of bay 21, looking
northeast. North porch entry is visible at right.
view plan
|
-
 |
North arcade, bays 19, 20, 21
The north arcade, triforium and clerestory are seen through
bay 18 of the south arcade. Bay 22 and the west wall are barely
visible at left of image.
view plan
|
-
 |
North arcade, bays 20, 21, 22
View is taken from south aisle looking northwest from
bay 19. Bay 22 is at left of image, bay 21 in center, bay 20 at
right.
view plan
|
-
 |
North aisle, bay 21
View from nave towards north wall, between piers of bay
21. Curtains are dividing bay 21 and bay 22.
view plan
|
-
Bay 22
-
 |
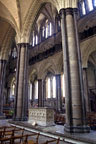
South arcade, bays 20 to 22
Viewed through north arcade (entry from north porch into
bay 18 is at right). Bay 22 is centered in image, with bay 20 at far
left.
view plan
|
-
 |
South arcade, bays 20 to 22
Viewed from nave, looking southwest. Bay 20 is at left,
bay 22 (westernmost bay) at right.
view plan
|
-
 |
South arcade, bays 20 to 22
Bay 22 is westernmost bay; bay 20 is at left of
image.
view plan
|
-
 |
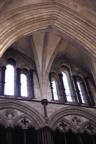
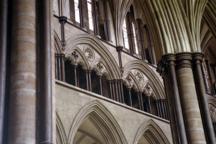
Triforium and clerestory, bay 22
Viewed through north arcade, looking southwest.
Note passage through buttress at clerestory
level.
view plan
|
-
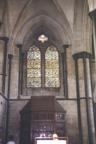
 |
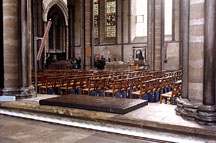
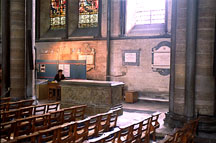
Bay 22, south aisle
View from nave, showing west and south walls. Note
entry in west wall.
view plan
|
-
 |
Bay 22, south aisle
View from nave, bay 21, looking southwest. Entry to
west walk of the cloister is behind pillar.
view plan
|
-
 |
South aisle wall, bay 22
Taken from nave, looking directly south into bay
22. Doorway opens into the west walk of the
cloister.
view plan
|
-
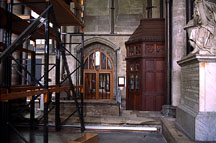 |
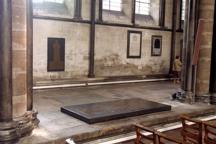
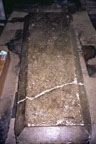
South aisle, bay 22
View taken from nave looking directly south into
bay 22. Entrance to cloister is directly facing viewer.
Entry into south porch of the west front is at right of
image. Unidentified Purbeck coffin on sleeper wall in
foreground.
view plan
|
-
 |
South aisle, bay 22
View north into westernmost bay of nave taken from
south aisle bay 22. South side of unidentified Purbeck
coffin is visible on sleeper wall between
piers.
view plan
|
-
 |
Unidentified coffin, south aisle, bay 22
|
-
 |
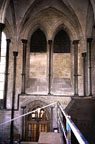
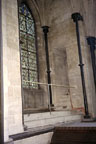
West wall, south aisle, bay 22
View to west wall of south aisle. Exit to south
porch of the west front is at bottom of image.
view plan
|
-
 |
Window, west wall, south aisle
Stairs in wall lead out of singing
gallery.
|
-
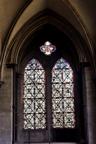
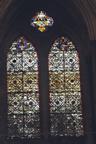 |
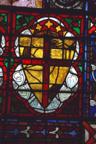
Window, west wall, south aisle
Lancets and quatrefoil located above south
portal of west front. Grisaille in the lancets dates c.
1225-58. Angels at tops of lancets were formerly in the
chapter house. A 16th century armorial of Bishop Jewel
is in the quatrefoil.
|
-
 |
Detail, quatrefoil, west window
16th century armorial of Bishop Jewel.
Angels in lancets were moved from the chapter
house.
|
-
 |
Left lancet, west window
Image taken with flash.
|
-
 |
West wall of nave, bay 22
Taken from nave, looking directly west.
view plan
|
-
 |
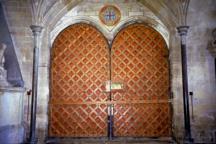
West central doors and triforium, bay 22
Doors open to central porch of the west
front.
view plan
|
-
-
 |
Consecration cross and sculptured boss
Located above central doors, bay
22.
|
-
 |
Consecration cross
Located above central doors, bay
22.
|
-
 |
Colonnette, molding, and boss, central door
Located to the left of the central
door.
|
-
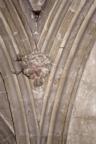
 |
Detail, sculptured boss
Located to left of central door. Note
traces of paint.
|
-
 |
Colonnette, molding, and boss, central door
Located to the right of central
door.
|
-
 |
Detail, sculptured boss
Located to right of central door. Note
traces of paint.
|
-
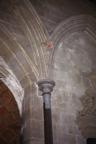
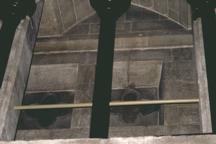
 |
Triforium, west wall
Located above central doors in west wall of nave.
Note depth of triforium passage.
view plan
|
-
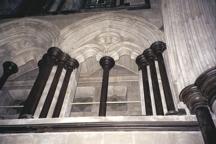 |
Triforium, west wall
Northern section of triforium, above central
doors.
view plan
|
-
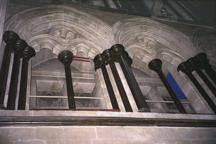
 |
Detail, triforium passage
Looking through triforium arcade into passage.
Note blocked quatrefoils in outer wall.
|
-
 |
Detail, triforium passage
Looking through triforium arcade into passage.
Note blocked quatrefoils in outer wall.
|
-
 |
Detail, triforium arcade
Molding at top of triforium
arcade.
|
-
 |
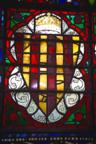
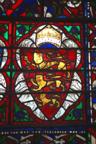
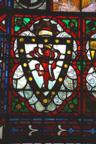
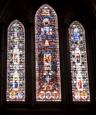
Windows, west wall of nave
Heraldic shields at bottom of lancets contain medieval
glass originally located in the chapter house.
view plan
|
-
-
 |
Heraldic shield, left lancet
Located at bottom left of left lancet. Arms of
Gilbert de Clare, Earl of Gloucester
(1262-1295).
|
-
 |
Heraldic shield, left lancet
Located at bottom right of left lancet. Made up
arms.
|
-
 |
Heraldic shield, center lancet
Located at bottom left of center lancet. Arms
of Eleanor of Provence, wife of Henry III (d.
1290).
|
-
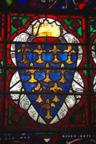 |
Heraldic shield, center lancet
Located at bottom center of center lancet. Arms
of Louis IX of France, brother-in-law of Henry III
(1226-1270).
|
-
 |
Heraldic shield, center lancet
Located at bottom right of center lancet. Arms
of Henry III.
|
-
 |
Heraldic shield, right lancet
Located at bottom left of right lancet. Arms of
Richard, Earl of Cornwall, brother of Henry III
(1225-1272).
|
-
 |
Heraldic shield, right lancet
Located at bottom right of right lancet. Arms
of Roger Bigod, Earl of Norfolk and Earl Marshall
(1225-1270).
|
-
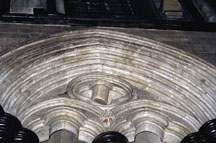
|
Nave vault, bay 22
West wall is visible at top of image.
view plan
|
-
 |
North arcade, bay 22
Viewed through south arcade, bay 20, looking
northwest.
view plan
|
-
 |
North arcade, bay 22
Seen from nave, bay 19
view plan
|
-
 |
North arcade, upper levels
Seen from nave, looking northwest.
view plan
|
-
 |
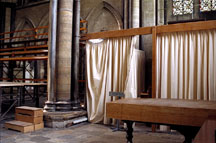
North aisle, bay 22.
View north from nave. Unidentified grave slab on
sleeper wall between nave and aisle. North wall hidden behind
curtain.
view plan
|
-
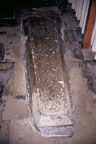 |
Unidentified grave slab,north aisle, bay 22.
Located on sleeper wall between nave and
aisle.
|
-
 |
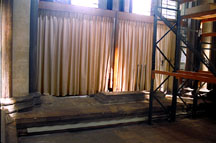
North aisle, bay 22
View to west from north aisle, bay 21. Curtains are
blocking west wall of north aisle.
view plan
|
-
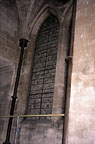
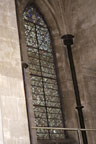
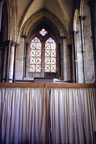 |
West wall, north aisle, bay 22
West wall lancets visible above curtain. Entry to
north portal of the west front is behind curtain. View taken
from north aisle, bay 21.
view plan
|
-
 |
Window, west wall, north aisle
Showing right lancet and stair in wall leading
out of singing gallery. Image taken with
flash.
|
-
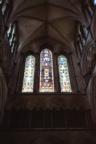
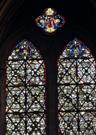
 |
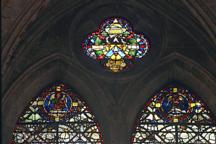
Window, west wall, north aisle
Lancets are painted grisaille, c. 1225-1258.
Medallions at top of lancets are from chapter house.
Arms of Thomas Ap Rice in quatrefoil, dated
1569.
|
-
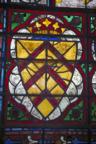
 |
Detail, lancets and quatrefoil
|
-
 |
North lancet
Taken with flash.
|
|


