|
Loading...
-
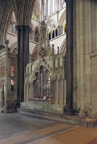
North Choir Aisle
-
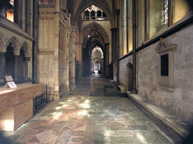 |
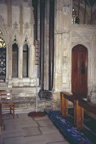
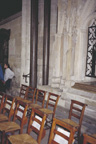
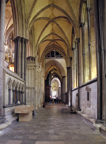
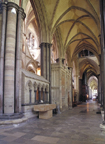
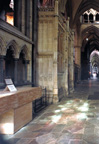
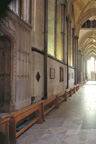
North choir aisle, to west
View taken from bay 5, looking down north aisle towards the
west end.
|
-
 |
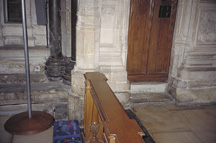
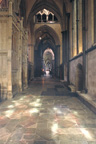
North choir aisle, to west
Taken from bay 5, looking to west end.
|
-
 |
North choir aisle, to west
View taken from bay 6, north choir aisle, looking
towards west front.
|
-
-
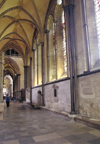 |
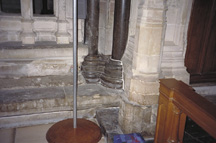
North wall, bay 5
Bays 4, 5, and 6, looking towards west (bay 4 at right
of image).
|
-
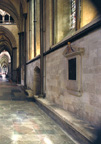 |
North wall, bay 5
North wall of bay 5 at right, bay 6 in the center
of image.
|
-
 |
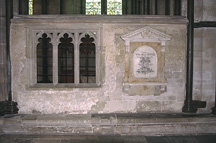
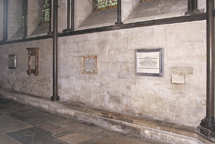
North wall, bay 5
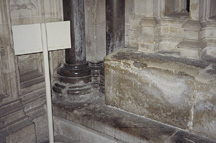
Masonry shows evidence of fastenings for temporary
wall.
|
-
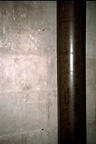 |
Masonry, bay 5 wall
|
-
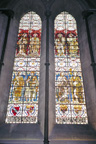 |
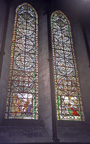
Lancets, bay 5
Two lancets at aisle level commemorating the fifth Earl
of Radnor and the Radnor family, c. 1900.
|
-
 |
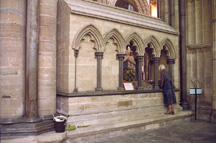
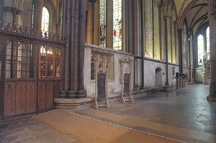
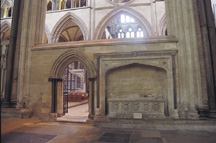
South wall, bay 5
View seen from bay 5, looking southwest. Bingham tomb
in bay 5 is at left, Audley Chapel in bay 6 at right.
|
-
 |
South wall, bay 5
View seen from bay 5, looking southwest. Bingham
tomb in bay 5 is at left, Audley Chapel in bay 6 at right.
|
-
-
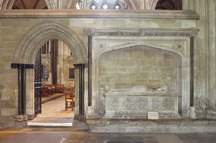
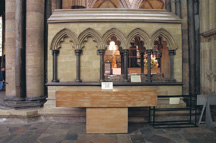 |
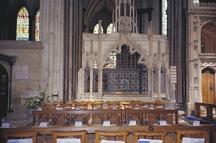
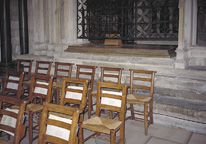
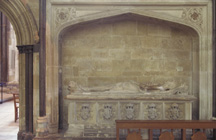
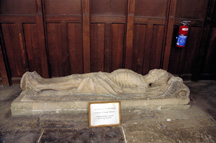
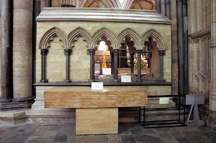
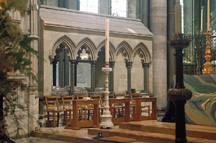
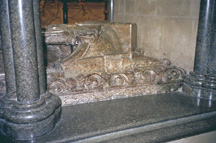
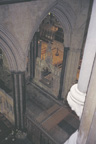
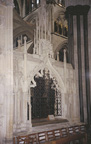
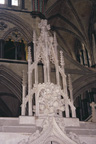
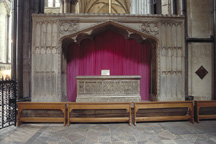
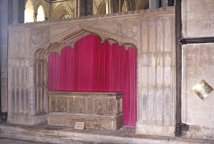
Bingham tomb, north side
Tomb attributed to Bishop Robert Bingham, d. 1246.
The 13th-century effigy and tomb was moved to the nave
during renovations in 1789. In the 1860s, the tomb was
replaced near the altar, and surrounded by a 19th century
canopy of George Gilbert Scott's design.
|
-
 |
Bingham tomb, north side
|
-
 |
Bingham tomb, north side
|
-
 |
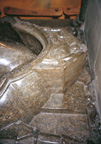
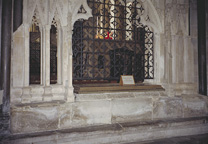
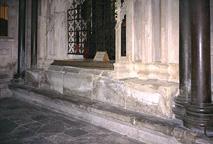
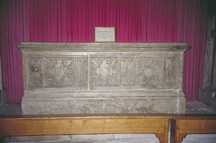
Bingham tomb, south side
View taken from inside the presbytery, bay 6. Altar
is at right of image.
|
-
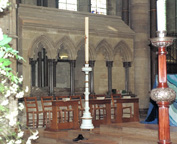 |
Bingham tomb, south side
View taken with flash.
|
-
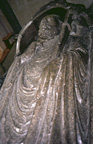 |
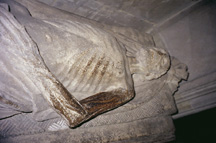
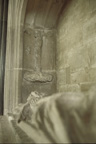
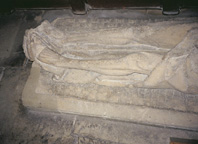
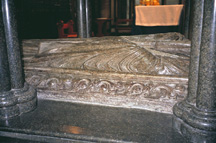
Bingham effigy
Purbeck marble effigy of Bishop Robert Bingham.
|
-
 |
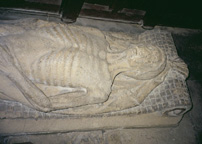
Detail, Bingham effigy
|
-
 |
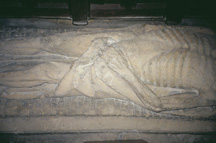
Detail, Bingham effigy
|
-
 |
Detail, Bingham effigy
|
-
 |
Detail, Bingham effigy
|
-
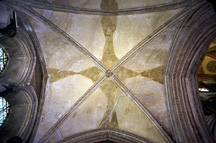 |
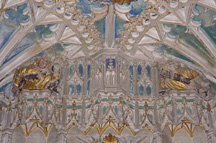
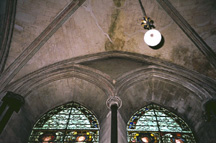
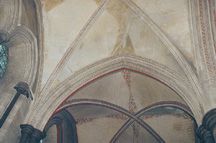
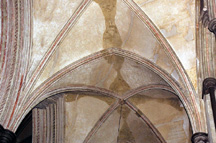
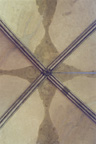
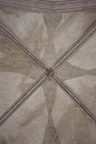
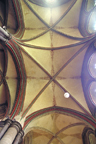
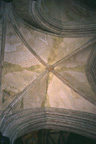
Vault, bay 5
Lancets of north window are to left.
|
-
 |
Vault, bay 5
Taken in natural light.
|
-
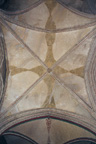 |
Vault, bay 5
Taken with flash.
|
-
 |
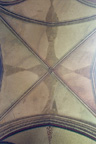
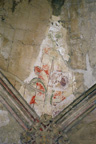
Vault detail
Taken in natural light.
|
-
 |
Vault detail
Taken with flash.
|
-
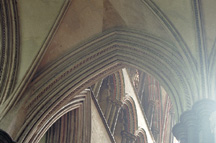 |
Vault, to south
View taken towards the south. The presbytery is
visible through the arcade. Taken in natural light.
|
-
 |
Vault to south
View of arcade and vault, taken to the south,
with flash.
|
-
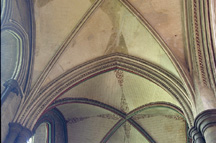 |
Vault to east
View taken from bay 5, with vault of bay 4 also
visible. Taken in natural light.
|
-
 |
Vault to east
View taken towards bay 4 in the east, with
flash.
|
-
 |
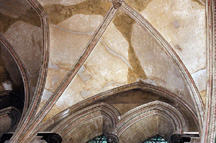
Arch, bays 5 and 6
Arch between bays 5 and 6, formed by the joining of
the two vaults. Taken in natural light.
|
-
 |
Arch, bays 5 and 6
View taken with flash.
|
-
 |
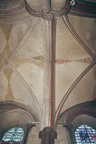
Vault to north
Lancets of north wall are visible. Taken in natural
light.
|
-
 |
Vault to north
Taken with flash.
|
-
 |
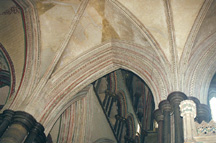
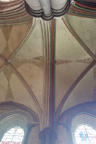
Vault to west
View taken from bay 5, towards bay 6 in the west.
Arcade and presbytery are on left, windows of north wall on
right. Taken in natural light.
|
-
 |
Vault to west
Taken with flash.
|
-
-
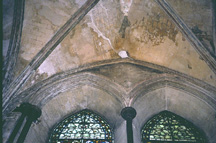
 |
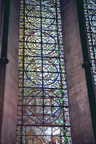
Lancets, bay 6
Window contains 13th-century grisaille glass, including
some removed from the chapter house.
|
-
 |
Bay 6, west lancet
|
-
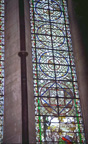 |
Bay 6, east lancet
|
-
-
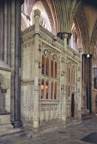 |
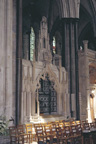
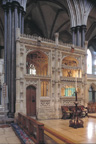
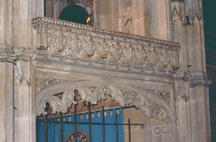
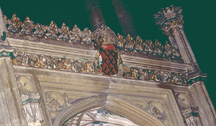
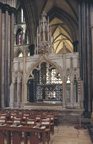
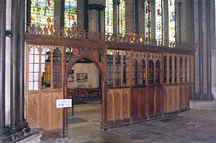
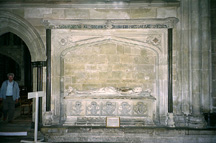
Audley Chapel, north side
Chantry chapel established by Bishop Audley, d.
1524. The bishop was buried beneath the chapel floor. North
side, taken from bay 5 of the north choir aisle.
|
-
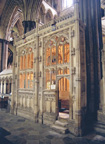 |
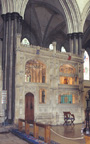
Audley chapel, north side
North side, taken from bay 7 of the north
aisle. The steps and doorway into the chapel are visible
in this view.
|
-
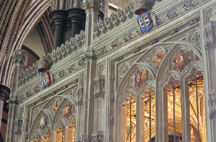 |
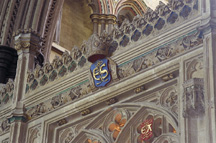
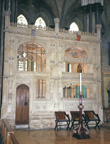
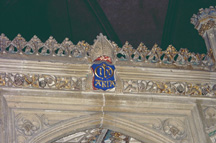
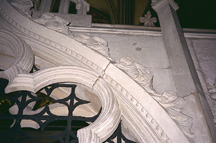
Parapet detail, Audley chapel
North side of the monument. Note the heraldic
shields on the parapet.
|
-
 |
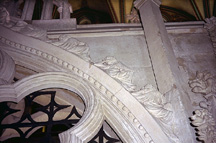
Parapet detail, Audley chapel
|
-
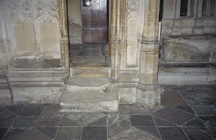 |
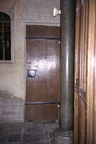
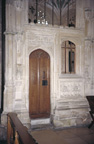
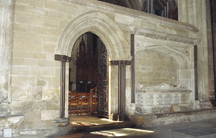
Chapel entrance, north aisle
Steps and entrance into the west end of the
chapel, from the north aisle.
|
-
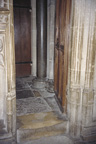 |
Entrance, Audley chapel
View into the Audley chapel taken through the
north aisle entrance.
|
-
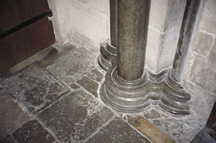 |
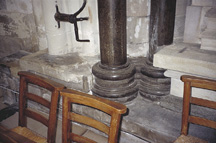
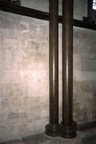
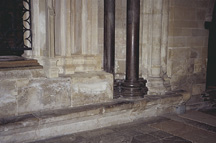
Column bases, chapel entrance
Paving and purbeck marble bases of columns
inside the Audley chapel.
|
-
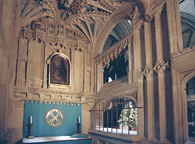 |
Interior, Audley chapel
Seen from the north choir aisle entrance, looking
towards east end of chapel. Altar is placed at the east end.
Through openings at the right is the presbytery.
|
-
 |
Audley chapel, south side
View taken from the presbytery, bay 7.
|
-
 |
Audley chapel, south side
View taken with flash.
|
-
 |
Audley chapel, south side
Taken from the presbytery, bay 6, directly to
north. Image taken with flash.
|
-
 |
Chapel entrance, from presbytery
|
-
 |
Detail, south wall
View taken from the presbytery of the south
wall of the chapel. Altar is seen through the opening.
|
-
 |
Parapet detail
Eastern portion of the chapel, taken from
presbytery.
|
-
 |
Parapet detail
Western portion of the chapel parapet, seen
from the presbytery.
|
-
 |
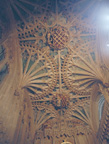
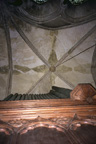
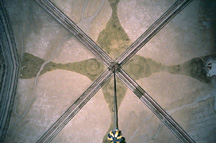
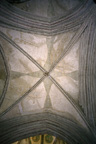
Vault, bay 6
Taken with flash. Lancets in north wall are visible at
left of image.
|
-
 |
Vault, bay 6
|
-
 |
Vault, detail
Taken in natural light.
|
-
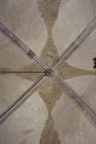 |
Vault, detail
Taken with flash.
|
-
-
 |
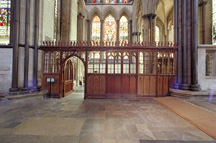
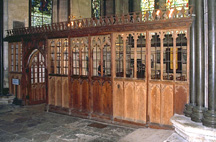
North wall, bay 7
Stone screen on the north side of the choir aisle at
bay 7. Beyond the screen is the south chapel of the northeast
transept.
|
-
-
 |
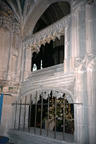
Mortival tomb, north side
View taken from the west triforium of the northeast
transept, looking down into the north aisle towards the
Mortival tomb.
|
-
 |
Mortival tomb, north side
View taken from the northeast transept, bay 8.
The presbytery is beyond the tomb. 14th-century tomb and
canopy is attributed to Bishop Roger de Mortival, d.
1330.
|
-
 |
Mortival tomb, north side
View taken from bay 5, looking southwest
towards monument.
|
-
 |
Mortival tomb, north side
|
-
 |
Tomb base and plinth
|
-
 |
Plinth detail
East end of the plinth, and purbeck
colonnette bases of pier between bays 7 and 6.
|
-
 |
Plinth detail
West end of plinth, north side, and purbeck
colonette bases of pier to the west.
|
-
 |
Decorative angels, west end
|
-
 |
Detail, angels, west end
|
-
 |
Finial, top of tomb
|
-
 |
Mortival tomb, south side
Seen from the presbytery, bay 7. The vaults of the
eastern chapels in the northeastern transept can be seen
behind the tomb.
|
-
 |
Vault, bay 7
|
-
 |
Vault detail
Seen in natural light.
|
-
 |
Vault detail
View taken with flash.
|
-
-
 |
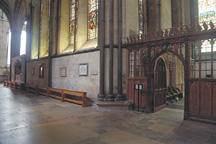
North wall, bays 8-5
Wooden screen of bay 8 is at left, and eastern bays
stretch to the right. Wooden screen leads into the northeast
transept.
|
-
 |
North wall, bay 8
Wooden screen that comprises the north wall of bay
8. It divides the north choir aisle from the northeast
transept, visible beyond.
|
-
 |
North wall, bay 8
Wooden screen, seen looking northeast into the
eastern chapels of the northeast transept.
|
-
 |
North wall, bay 8
Wooden screen, looking to northwest. West wall of
northeast transept visible beyond.
|
-
 |
North wall, bays 8-11
Wooden screen of bay 8 is at the right of image,
and the view stretches down the north aisle towards the
west. The bright light at left is the main transept.
|
-
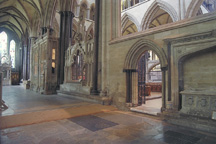 |
South wall, bays 8-5
Stone screen of bay 8, with entrance into the choir and
presbytery, is at right of image. View extends down the north
aisle towards the east end.
|
-
 |
South wall, bays 8-11
Stone screen of bay 8 is at left, and view extends
down the north aisle towards the west.
|
-
 |
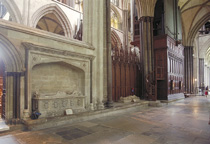
South wall, bay 8
Entrance to the choir and presbytery is at left,
and the tomb of Thomas Bennett, Precentor, d. 1558, is at
right.
|
-
 |
South wall, bay 8
|
-
 |
South wall, bay 8
Showing entrance to choir and tomb of Thomas
Bennett.
|
-
 |
Tomb, Thomas Bennett
In niche of south wall, bay 8.
|
-
-
 |
North wall, bay 9
Bay 9 at right, bay 10 recedes towards the west.
|
-
 |
Vault, bay 9
Bay 9 in the center, with bay 8 at top and bay 10 at
bottom. North wall is at right of image.
|
-
 |
Vault, bay 9
Lancets of north wall are visible at bottom of
image.
|
-
 |
Vault, bay 9
Taken in natural light.
|
-
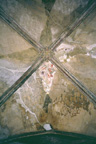
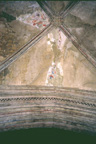
 |
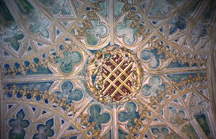
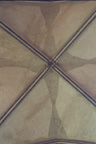
Vault detail
Seen in natural light. Note traces of medieval
polychromy and pattern near center of vault.
|
-
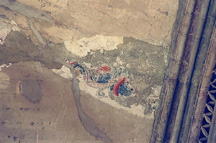
 |
Vault detail
Pattern at the center of the vault, seen with
artificial light.
|
-
 |
Vault detail
|
-
 |
Vault detail
Taken in natural light.
|
-
 |
Vault detail
View taken with flash.
|
-
 |
Juncture, vault and north wall
|
-
-
-
 |
North wall, bays 11-3
The north wall of bay 11 is at the left; the view
stretches towards the east end of the north aisle at bay 3,
where the eastern windows are visible.
|
-
 |
North wall, bay 11
The niche holds the tomb of Bishop Woodville.
Beyond the wall and tomb are the eastern chapels of the
north transept.
|
-
 |
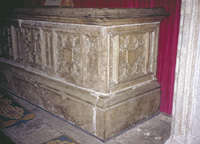
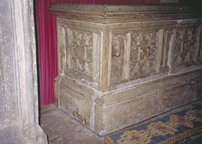
Tomb, Bishop Woodville
South side of tomb chest ascribed to Bishop Woodville,
d. 1484, in canopied niche of north wall, bay 11.
|
-
 |
Tomb, Bishop Woodville
South side of tomb chest. Within the quatrefoils
are fittings for heraldic shields.
|
-
 |
Detail, Woodville tomb
Southeast corner, Woodville tomb
|
-
 |
Detail, Woodville tomb
Southwest corner, Woodville tomb.
|
-
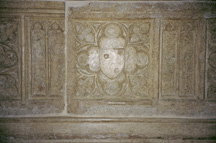 |
Detail, Woodville tomb
Central quatrefoil, south side.
|
-
 |
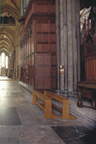
South wall and entrance to north aisle
View taken from bay 12, just at entrance to north choir
aisle. Bays 11 and 10 of the south wall of the north choir aisle
are visible. (The wooden structures between the piers enclose
the choir stalls.)
|
-
 |
South wall, bays 11-3
The north wall of bay 11 is at the right; the view
stretches towards the east end of the north aisle at bay 3,
where the eastern windows are visible.
|
-
 |
Vault, bay 11
North wall is at the left.
|
|