|
Loading...
-
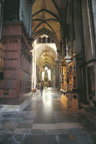
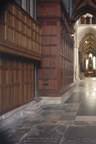
South Choir Aisle
-
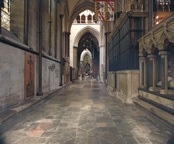 |
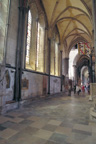
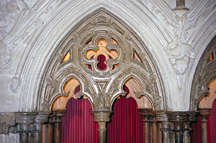
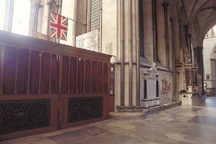
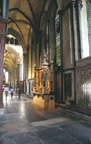
South choir aisle, to west
View taken from bay 5, looking down south choir aisle
towards the cathedral's west end.
|
-
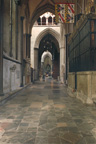 |
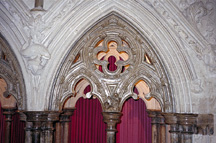
South choir aisle, to west
View taken from bay 5, south choir aisle, looking
towards west front.
|
-
 |
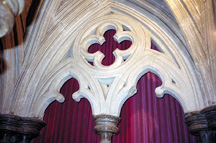
South choir aisle, to west
View taken from bay 4, south choir aisle, looking
towards west front.
|
-
 |
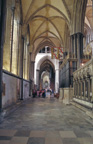
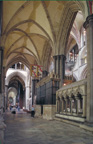
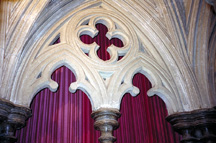
South choir aisle, to east
View taken from bay 11, looking down south choir aisle
towards the cathedral's east end.
|
-
 |
South choir aisle, to east
View taken from bay 11, looking down south choir aisle
towards the cathedral's east end.
|
-
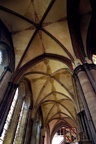 |
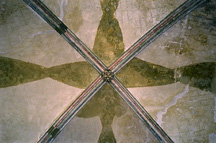
Vaults, south aisle, bays 4,5,6,7
View taken to west with bay 4 at top of image.
|
-
-
 |
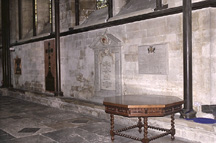
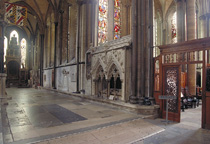
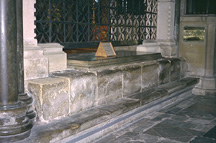
North wall, bay 5
Tomb at north side of the south aisle, bay 5, at right
of image. Bay 6 and beyond extend to the left (west).
|
-
-
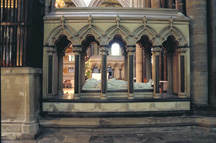 |
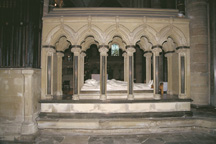
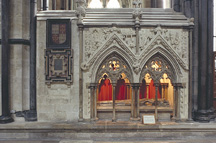
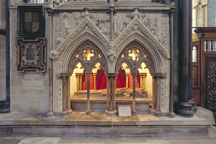
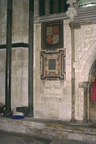
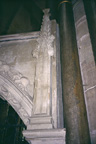
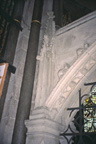
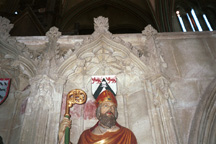
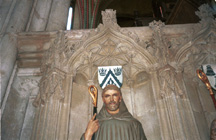
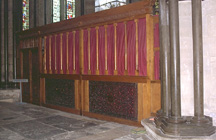
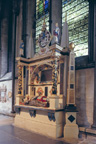
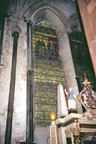
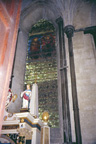
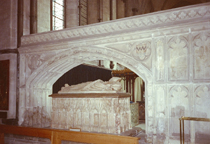
Hamilton tomb, south side
Tomb of Bishop Hamilton, d. 1869, designed by
George Gilbert Scott. Seen here in natural light.
|
-
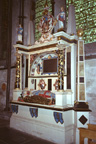
 |
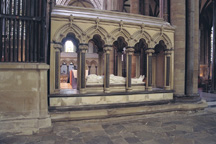
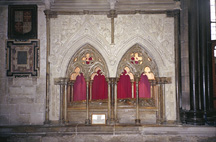
Hamilton tomb, south side
Picture taken with flash.
|
-
 |
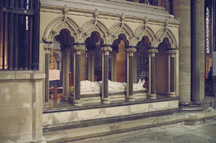
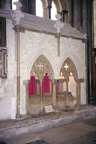
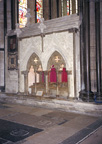
Hamilton tomb, south side
View slightly from the southwest, taken in
natural light.
|
-
 |
Hamilton tomb, south side
|
-
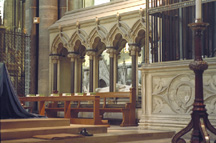 |
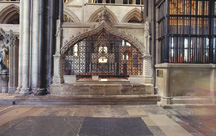
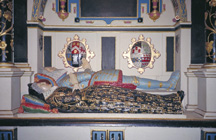
Hamilton tomb, north side
View taken from inside the presbytery, looking to
the southeast towards Hamilton tomb. The steps lead up to
the high altar, also in bay 5.
|
-
 |
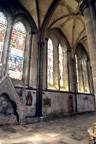
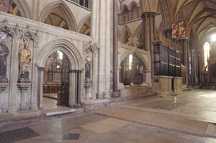
South wall, bay 5
Bay 5 (first full bay, from left) and beyond, looking
towards the west end.
|
-
 |
South wall, bay 5
Bay 4 (at left), bay 5 (center), bay 6 (right) of
south wall, south choir aisle.
|
-
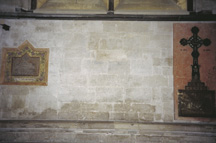 |
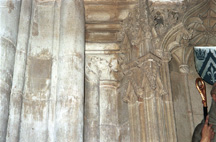
South wall, masonry
Shows disturbed masonry in bay 5, between the
memorial tablets.
|
-
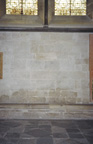 |
South wall, masonry
|
-
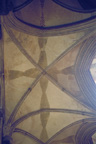 |
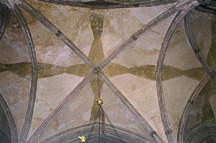
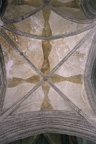
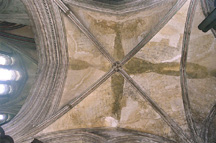
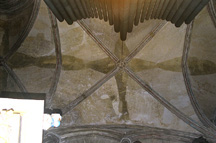
Vault, bay 5
Window of south wall is to the right. View taken in
natural light.
|
-
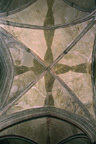 |
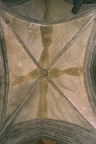
Vault, bay 5
View taken with flash to show up medieval
polychromy.
|
-
 |
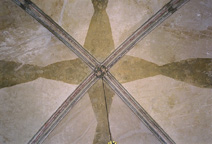
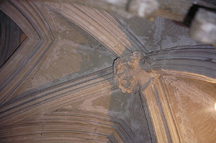
Vault detail
Center of vault, taken with flash.
|
-
-
 |
South wall, bay 6
|
-
-
 |
Hungerford Chapel, south side
View taken from south aisle.
|
-
 |
Hungerford Chapel, south side
|
-
 |
Hungerford Chapel, north side
Taken from inside the presbytery.
|
-
 |
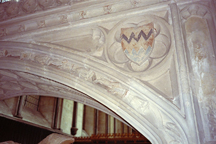
Hungerford Chapel, ceiling
Detail of interior ceiling, Hungerford Chapel.
|
-
 |
Lancets, bay 6
Seen from bay 4, looking southwest over the east
presbytery enclosure.
|
-
 |
Vault, bay 6
|
-
 |
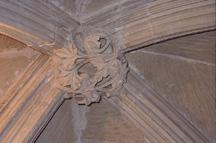
Vault detail
Center of vault, taken with flash.
|
-
-
 |
South wall, bay 7
From right to left are bay 8 (entrance to east transept
through screen), bay 7, bay 6, bay 5, and the east end of south
choir aisle. The tomb of Bishop Giles de Bridport is on the
south side of bay 7, forming a division between the south choir
aisle and the eastern chapels of the southeast transept.
|
-
-
 |
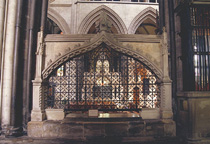
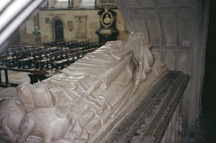
Bridport tomb, north side
View taken from south aisle, looking at north side
of tomb of Bishop Giles de Bridport, d. 1262, located on
plinth between south choir aisle and east chapels of
southeast transept. Seen here in natural light.
|
-
 |
Bridport tomb, north side
Seen from south aisle, in natural light,
showing artificially illuminated interior.
|
-
 |
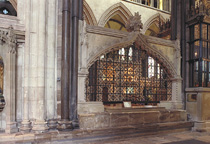
Bridport tomb, north side
East end of Bridport tomb, taken from south
aisle, bay 6, looking southwest. Effigy under canopy is
visible from this viewpoint.
|
-
 |
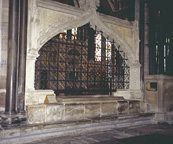
Bridport tomb, north side
West end of Bridport tomb seen from south
aisle, bay 8, looking southeast.
|
-
 |
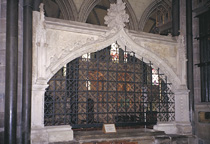
Bridport tomb, north side
View from south aisle, looking at north side.
Taken with flash.
|
-
 |
Tracery, exterior
Purbeck marble tracery within stone canopy,
east bay. Taken with flash.
|
-
 |
Tracery, exterior
Purbeck marble tracery within stone canopy,
west bay. Taken with flash.
|
-
 |
Tracery, interior
Tracery on south, or chapel side, is Chilmark
stone. East bay seen here from inside canopy.
|
-
 |
Tracery, interior
Tracery on south, or chapel side, is Chilmark
stone. West bay seen here from inside canopy.
|
-
 |
Interior vault
Interior vault and boss, east bay.
|
-
 |
Interior vault
Interior vault and boss, west bay.
|
-
 |
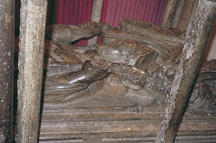
Bridport effigy
West half of effigy, from above.
|
-
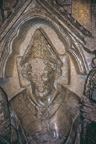 |
Bridport effigy
View of effigy head from above, west end.
|
-
 |
Bridport effigy
West end of effigy, from side.
|
-
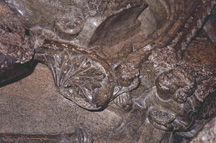 |
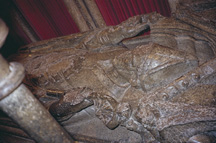
Bridport effigy
Detail of crosier and angel bearing an
incense boat.
|
-
 |
Wall adjacent to Bridport tomb
Seen from south aisle, looking southeast.
Bridport tomb is to the right of image.
|
-
-
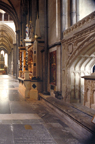
 |
Ghent tomb, south side
Tomb of Bishop Simon de Ghent, d. 1315, on north
side of south choir aisle, bay 7. View is of south side of
tomb, taken from the choir aisle.
|
-
 |
Ghent tomb, south side
|
-
 |
Ghent tomb, south side
Seen from bay 8 of south choir aisle.
|
-
 |
Ghent tomb, south side
|
-
 |
Ghent tomb canopy
|
-
 |
Ghent tomb canopy
Sculptural details at east end of canopy.
|
-
 |
Ghent tomb canopy
Sculptural details, east end of canopy.
|
-
 |
Ghent tomb canopy
Sculptural details, east end of canopy.
|
-
 |
Ghent tomb canopy
Sculptural details, west end of canopy.
|
-
 |
Ghent tomb canopy
Sculptural details at west end.
|
-
 |
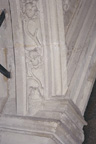
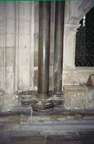
Ghent tomb plinth
Tomb base and plinth.
|
-
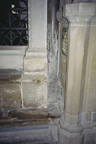 |
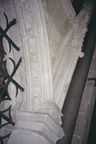
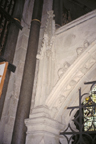
Ghent tomb, east end
Juncture of tomb and pier at east end of tomb.
|
-
 |
Ghent tomb, west end
Juncture of tomb and pier, west end.
|
-
 |
Vault, bay 7
Entrance archway to the southeast transept is at bottom
of image (west).
|
-
-
 |
North wall, bay 8
The north wall of the south choir aisle at bay 8 serves
as the entrance to the choir, at the crossing of the east
transept. Bay 8 is at the left, bays 7 and 6 recede to the east.
|
-
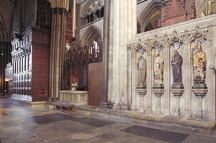 |
North wall, bay 8
Bay 8 is at right of image; in this view the figures
flanking the west side of the entrance to the choir are visible.
Bays 9 and 10 recede to the west.
|
-
 |
North wall, bay 8
Screen and entrance to choir at crossing of eastern
transept.
|
-
 |
Screen east of door
Female saint located to the east of the door into
the choir.
|
-
 |
Niche, female saint
Detail of underside of niche above female
saint.
|
-
 |
Masonry details
Masonry to east of female saint.
|
-
 |
Bases to east
Bases located east of female saint.
|
-
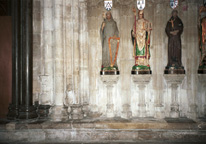 |
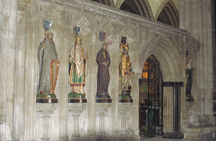
Screen west of door
Showing figures on the screen to the west of the
entrance to the choir.
|
-
 |
Bishop
|
-
 |
Masonry details
Located to west of bishop figure.
|
-
 |
Franciscan (?)
|
-
 |
Masonry details
Located to west of Franciscan figure.
|
-
 |
Bases to west
Bases located at west end of screen.
|
-
 |
South wall, bay 8
The south wall of bay 8 is a wooden screen at the
entrance to the southeast transept (at left); bays 9 and 10
recede to the west.
|
-
 |
South wall, bay 8
View looking southeast towards screen leading into
southeast transept, at south side of bay 8.
|
-
-
 |
South wall, bay 9
|
-
 |
Vault, bay 9
Arch leading to southeast transept at left.
|
-
-
 |
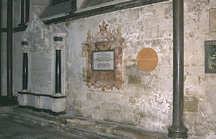
South wall, bay 10
View taken from bay 11, looking southeast. South wall
of bay 10 is in center of image.
|
-
 |
South wall, bay 10
South wall of bay 10 is dominated by the Mompesson
monument.
|
-
 |
Mompesson monument
Seen from bay 11, looking southeast. Monument contains
effigies of Sir Richard Mompesson, d. 1627, and wife Katherine.
Monument was formerly on the north side of the aisle. View taken
with flash.
|
-
 |
Mompesson effigies
|
-
 |
Lancets, bay 10
East lancet of the south aisle window, bay 10. Glass
designed by William Morris and Edward Burne-Jones and executed
by Morris and Co.
|
-
 |
Lancets, bay 10
West lancet of the south aisle window, bay 10.
Glass designed by William Morris and Edward Burne-Jones and
executed by Morris and Co.
|
-
 |
Vault, bay 10
South wall is at bottom of image; the organ comprises
the north wall.
|
-
-
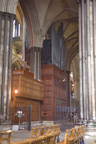 |
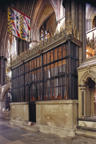
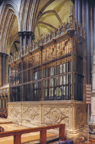
North wall, bays 11 and 10
Bay 11 at left, bay 10 at right, with organ. Wooden
screen at bay 11 encloses the choir stalls. View taken from
south transept, looking northeast.
|
-
 |
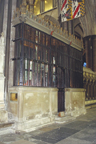
North wall, bays 11, 10
Wooden screen in bay 11 (left) behind choir stalls
and in bay 10 (right) around the organ.
|
-
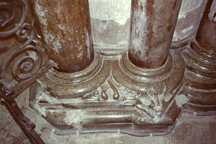 |
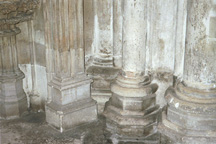
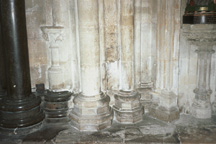
Bases at entrance to south aisle
Column bases on north side of south aisle.
|
-
 |
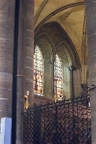
South wall, bays 11,10
Looking towards east end, with bay 11 in foreground,
bay 10 and on stretching towards east end of south aisle.
|
-
 |
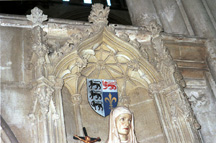
Tomb, Bishop Medford
Canopied table tomb of Bishop Medford, d. 1407, located
on plinth between south choir aisle and east chapels of the
south transept. Seen here from south choir aisle, looking south
towards south transept chapels.
|
-
 |
Detail, Medford tomb
Heraldic shield painted on west end of tomb canopy.
|
-
 |
Effigy, Bishop Medford
Seen from underneath the canopy.
|
-
 |
Vault, bay 11
South wall is at left.
|
|